Intro to Sellr
Setting Up Your Ecommerce Store
Editing Your Ecommerce Store
The "Action" Section
The "Manage" Section
The "View" Section
The "Marketing" Section
The "Advertising" Section
The "Fulfilment" Section
The "Website" Section
Website Domain Name
Your Logo
Edit your Website
Manage your Blog
Website Chat
Feature Blocks - Galleries
The "Configure" Section
Migrating to Sellr
Selling in Person
Selling Online
Discounts and Promotions
Invoicing and Quotes
Items for Sale
Website Themes
Payments
Domains
Shipping
Managing Orders
Contact Management
Tax Settings
Email Marketing
Telesales
Selling On Marketplaces
Selling On Social Media
Connecting to Other Systems
How to Increase Your Sales
Edit Your Website
- This topic has already been partially covered in a series of documents and videos here.
- The system has a Reserve Website feature that allows you to set up and edit two stores at the same time. This allows you to always have a website "in reserve" in case you need to make any changes or big updates on one that would cause downtime
To access your primary and reserve websites to edit them, please follow these steps:
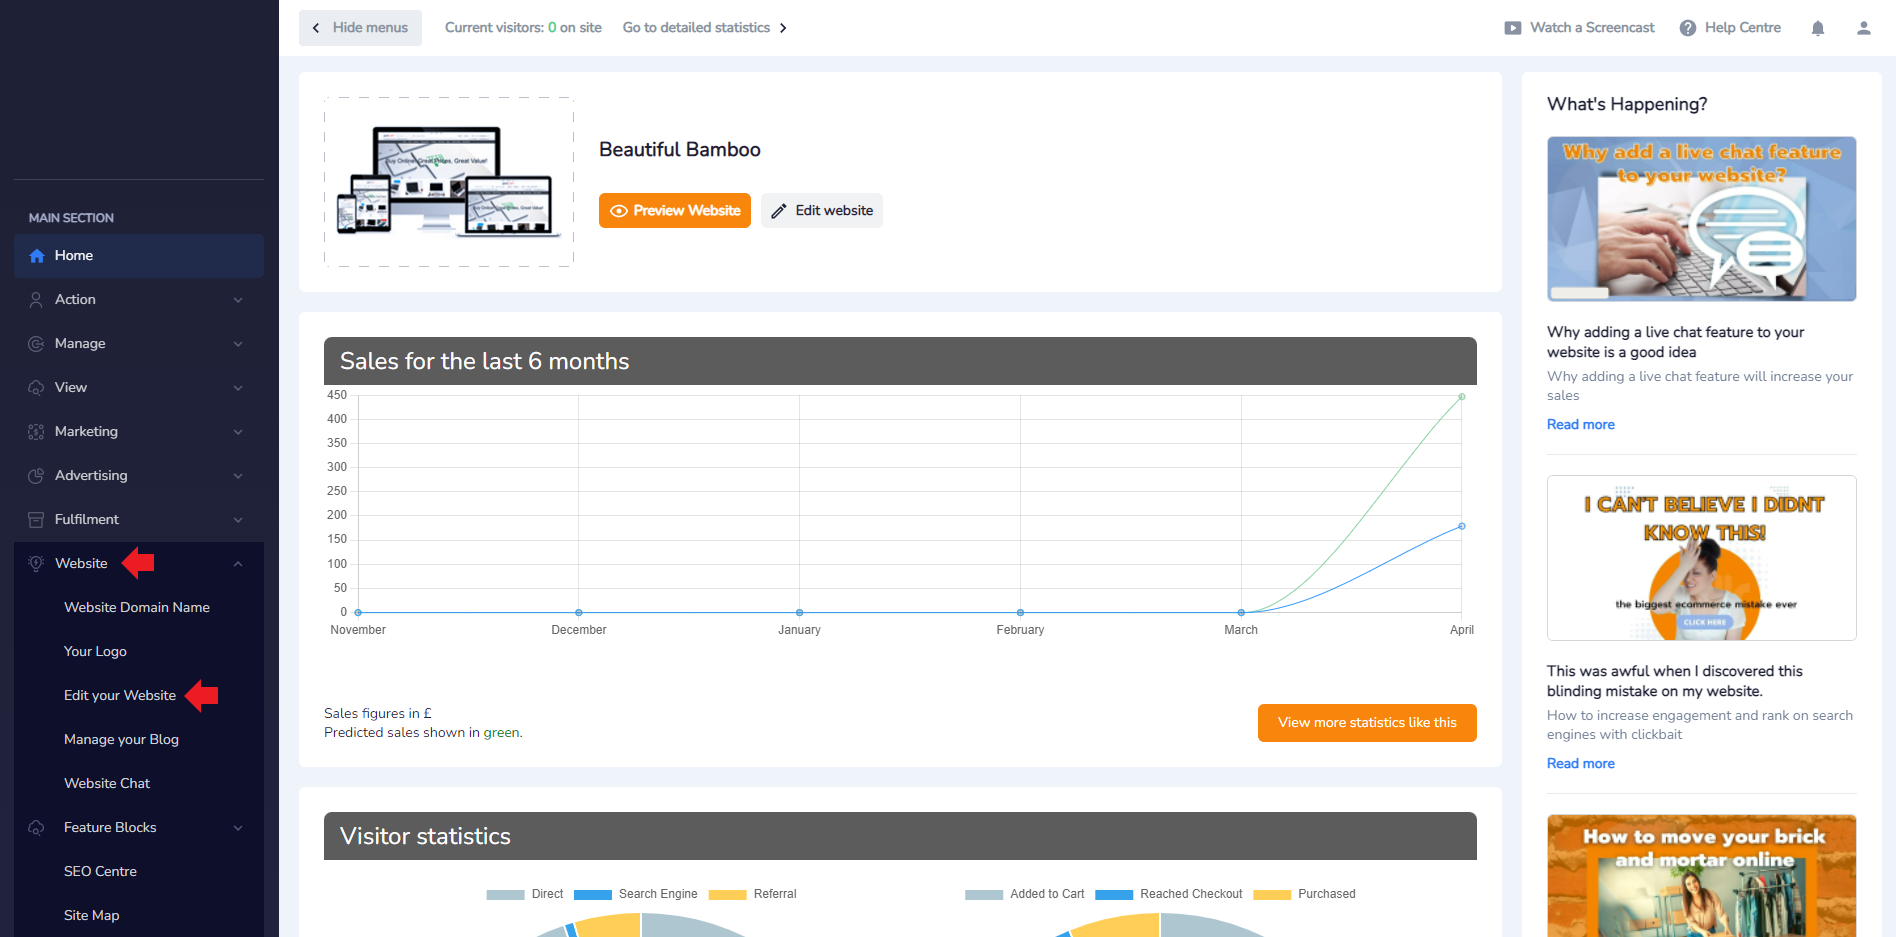
- From the Admin Panel, look to the left and select Website > Edit your Website:
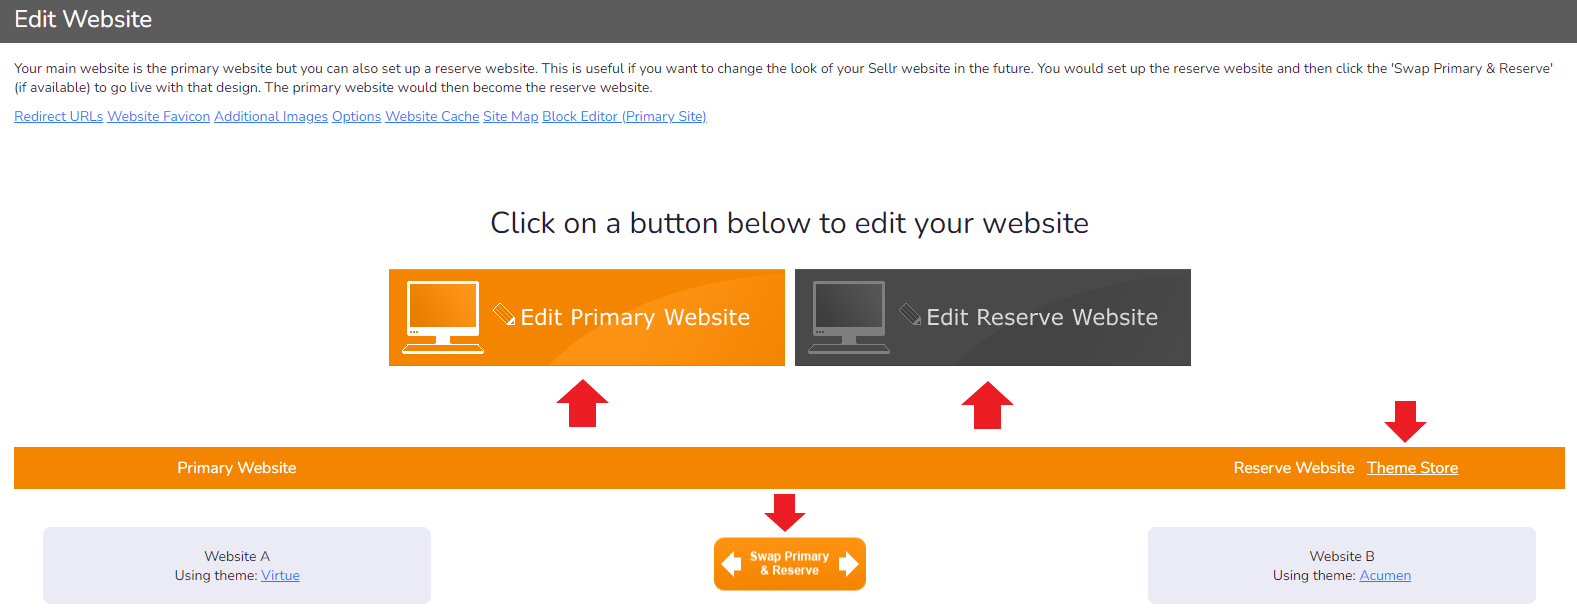
- The next page shows your Primary Website in orange and your Reserve Website in black
- Edit Primary Website = Click this to be moved into Edit Mode on your currently selected Primary Website
- Edit Secondary Website = Click this to be moved to Edit Mode for your Reserve Website
- Swap Primary & Reserve = Click this to switch your Primary and Secondary websites
- Reserve Website Theme Store = Click this to select a different theme for your Reserve Website. Please note that you can only change the theme on your Reserve Site. If you want to change the theme of your Primary Store, you will first need to switch your Primary to your Reserve by using the Swap Primary and Reserve option, slecting a new theme and then swapping back again
- Looking along the top, we can see a selection of options. From left to right:

Redirect URL's
- This is used if your domain name has previosuly been used on a different site. Use this to connect old URL links to your previous site/store to your current one
- Select Add New Redirect URL:

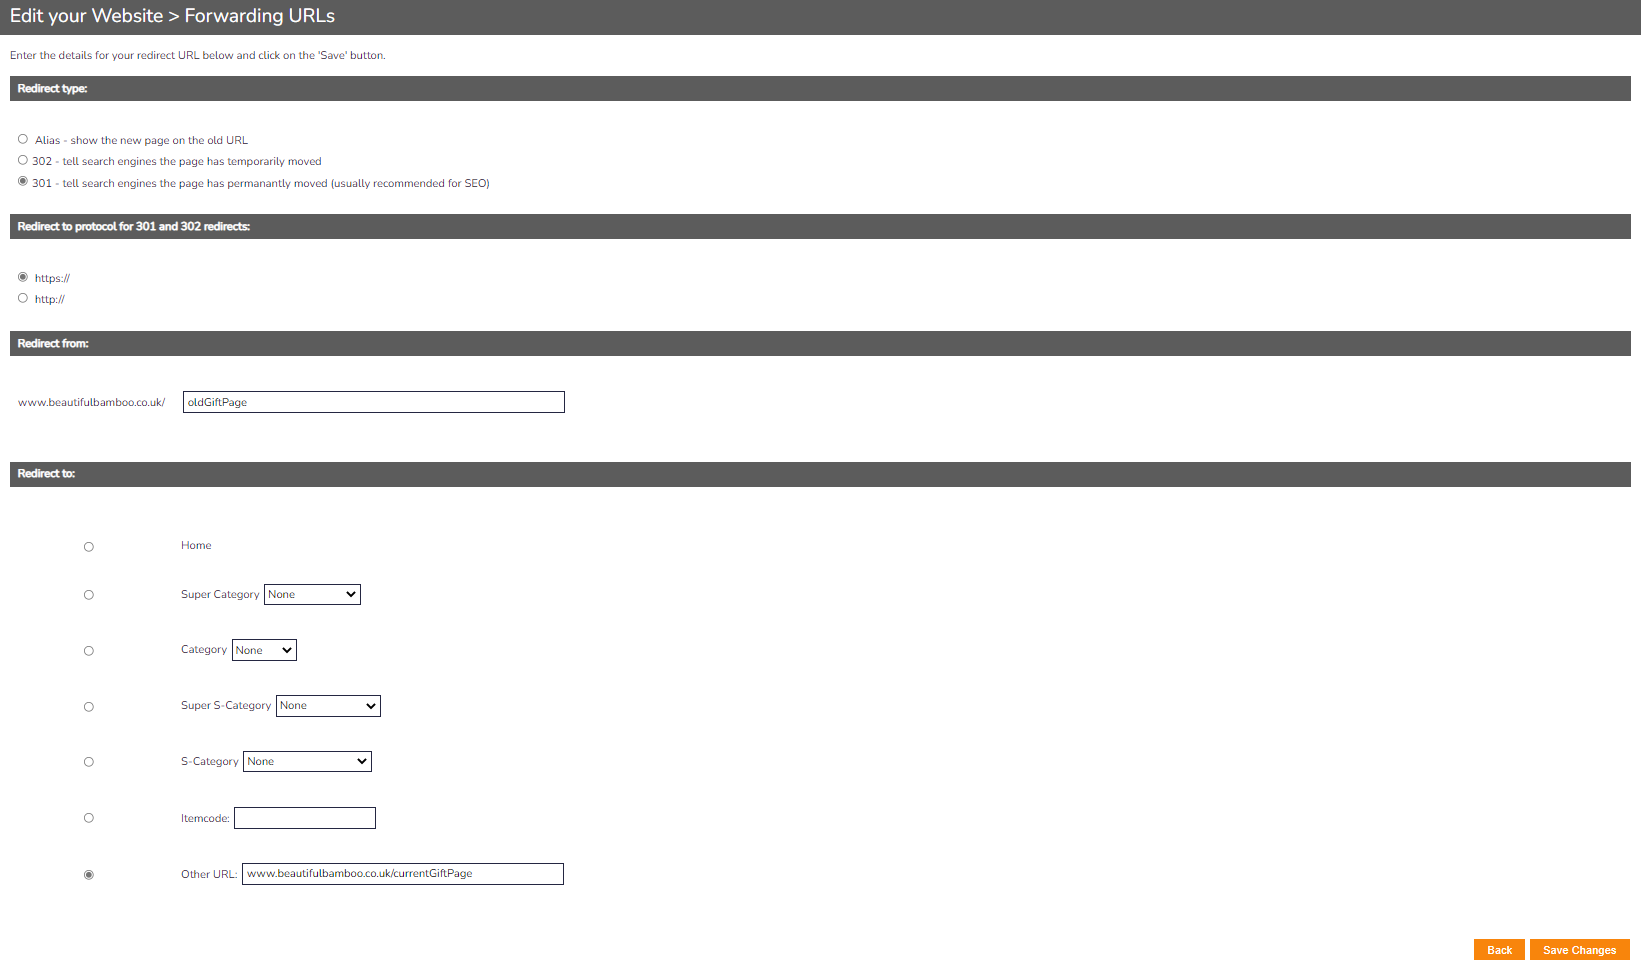
- The next screen displays a number of options. Make your changes and then don't forget to select the orange Save Changes button when you are done:
- Redirect Type = The type of redirect to perform. Alias will show the new page will be shown on the old URL. 302 tells the search engines that the page has temporarily moved to a differnt URL. 301 will tell the search engines that the URL has moved permanently to the new URL (this is the preferred method for SEO purposes)
- Redirect protocol for 301 and 302 redirects = The protocol to redirect to. Generally speaking, you should be using HTTPS:// for enhanced security
- Redirect from = The old URL
- Redirect to = You can use the drop down menus to select specific pages that exist on your current sitemap or use the Other URL option
Website Favicon
- A favicon is a tiny logo or image that displays to the left of the tabs in your browser:
![]()
- Select Choose File, locate your image and then select the ornage Upload button:

- Now when a customer accesses your store, they will be shown the image on their browser tab
Additional Images
- This section is used to uplaod images to the site. You can also drag and drop images anywhere that is editable on the site
- Simply select Choose File, locate the file that you want to upload and then press the orange Click here to Upload button:

Options
- Adjustable site options. For the most part, these can all be left as most are reccommended for speed and stability on your site
- If you make any changes, remember to press the orange Save Changes button in the bottom right:

Website Cache
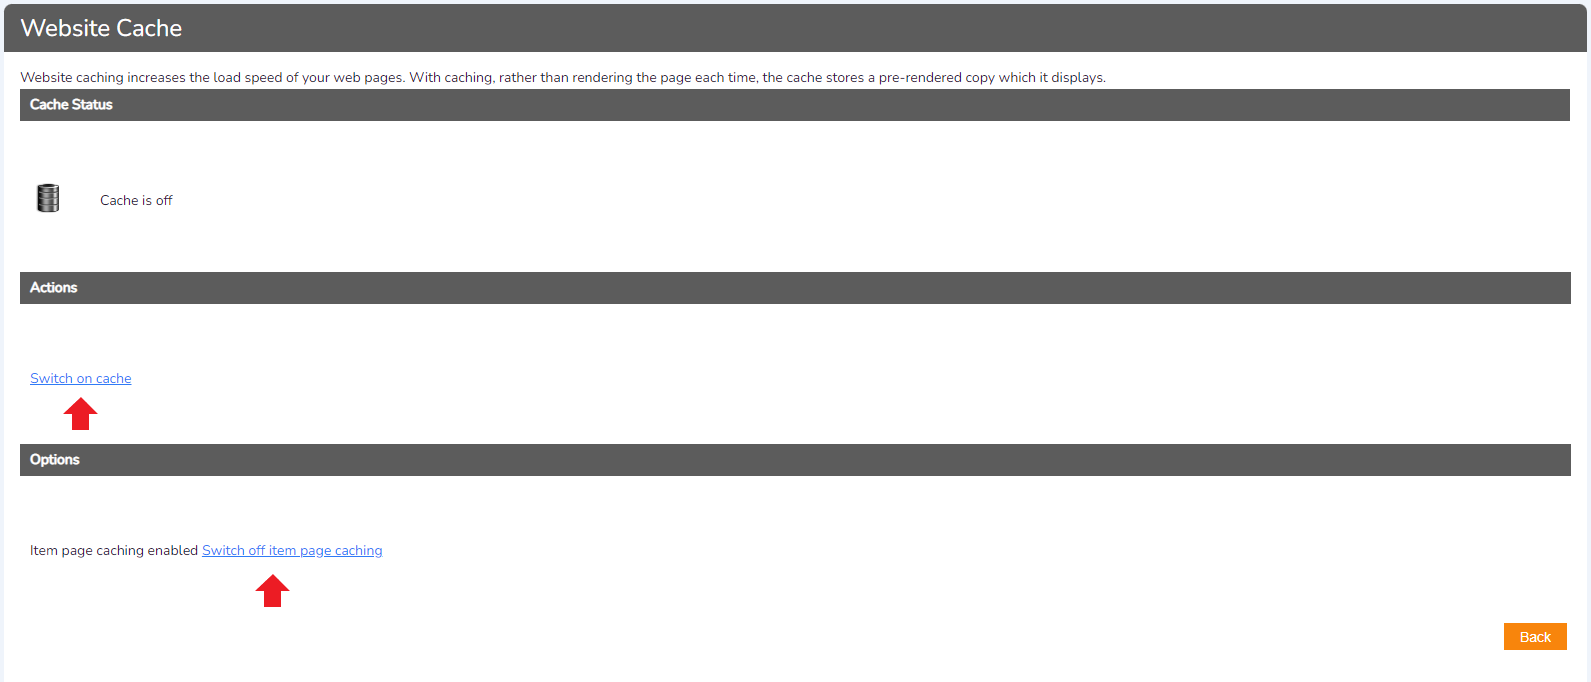
- Using the cache means storing parts of your store to speed up webpage loading. Instead of all parts of the store being loaded every time a customer accesses it, it retains some important parts, speeding up the loading times
- Press Switch On Cache to turn on the cache. Press Switch on item page caching to turn on the cache for your item page:
Website Sitemap
- Sitemaps are used by search engines to find the files and pages that are present on your website. You may want or need to add your sitemap to Google dashboard if you are using Google Dashboard as an example
- Select Generate a New Site Map to create a new file that contains your hierarchical sitemap. Follow the provided instructions to upload it to Google if needed:

Block Editor
- Allows you to create content blocks using HTML. This gives you more flexability with themes or rich media upon your site. You will need to be able to write HTML to utilise this feature properly
- Select Add New Content Block:

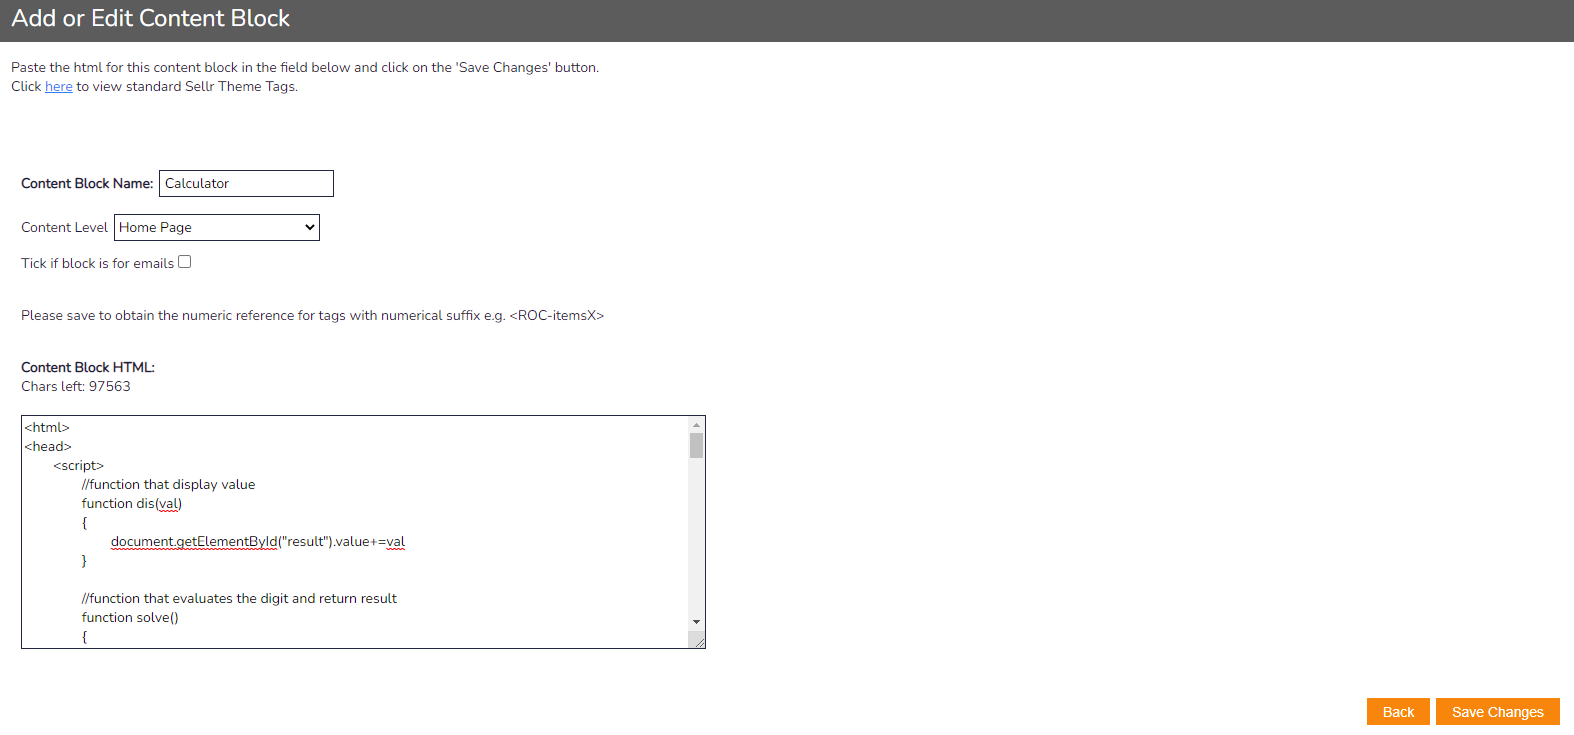
- Input your HTML into the proivded area and then select a Content Level and Name. Once complete, select Save Changes:
