
Intro to Sellr
Setting Up Your Ecommerce Store
Editing Your Ecommerce Store
The "Action" Section
The "Manage" Section
The "View" Section
The "Marketing" Section
CRM (Customer Relationship Manager) - Overview
Contacts - Contact Lists
Contacts - Import Lists
Contacts - Export List
Email Marketing - Schedule Emails
Email Marketing - On Page Sign Up
Email Marketing - Popup Email Signup
Email Marketing - Follow Up Emails
Autoresponders - Prospect Sequences
Autoresponders - Customer Sequences
Autoresponders - Item Sequences
Autoresponders - Welcome Back Sequence
TPS Screening
Add a Contact
Customer Accounts
GDPR
Social Media - Connecting Accounts
Social Media - Follow Icons
Promotions and Offers - Coupons
Promotions and Offers - Promotional Codes
Promotions and Offers - Offers
Promotions and Offers - Discounts
Promotions and Offers - Bundles
Promotions and Offers - Gift Cards
Cross-Sell and Up-Sell
External Scripts
Amazon Associates
The "Advertising" Section
The "Fulfilment" Section
The "Website" Section
The "Configure" Section
Migrating to Sellr
Selling in Person
Selling Online
Discounts and Promotions
Invoicing and Quotes
Items for Sale
Website Themes
Payments
Domains
Shipping
Managing Orders
Contact Management
Tax Settings
Email Marketing
Telesales
Selling On Marketplaces
Selling On Social Media
Connecting to Other Systems
How to Increase Your Sales
Promotions and Offers - Bundles
A bundle allows customers to choose from a selection of items and optionally buy them together at a reduced cost. The bundle starts with a container item. For example with a chocolate selection, the customer might select from a number of different presentation boxes to contain the chocolates. On this page you set up the overall discount, if there is one and the details of the container item. Once you set this up you can specify the members - the items which can be selected within the bundle
To set up a bundle, follow these steps:
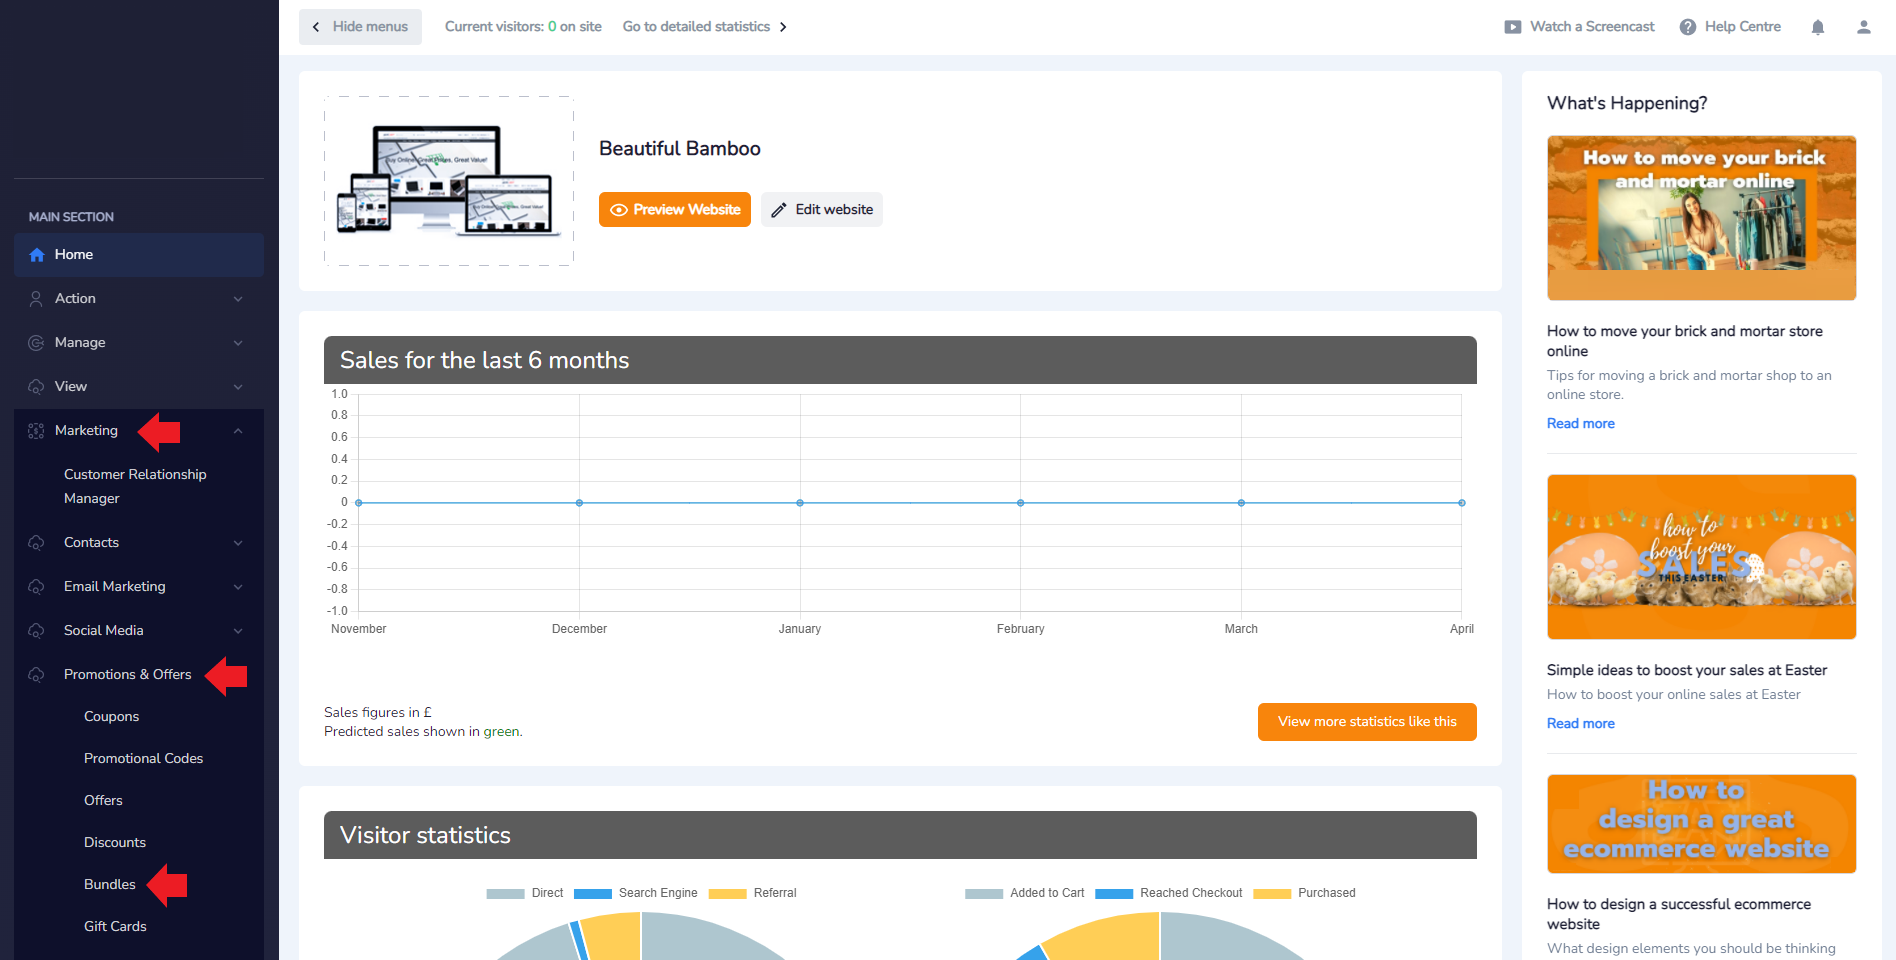
- From the Admin Panel, select Marketing > Promotions and Offers > Bundles:
- On the Bundle Manager, select Add New Bundle from the top of the screen:

- Fill in the available fields as needed. In this example, I am going to bundle together cutlery items in my Item Manager as a Cutlery Bundle that will have a fixed price for all the items. Once the settings are set to our requirements, press the orange Save Changes button:

- You will be returned to the Bundle Manager. Select the Box icon under the Members column to begin adding specific items to this bundle:

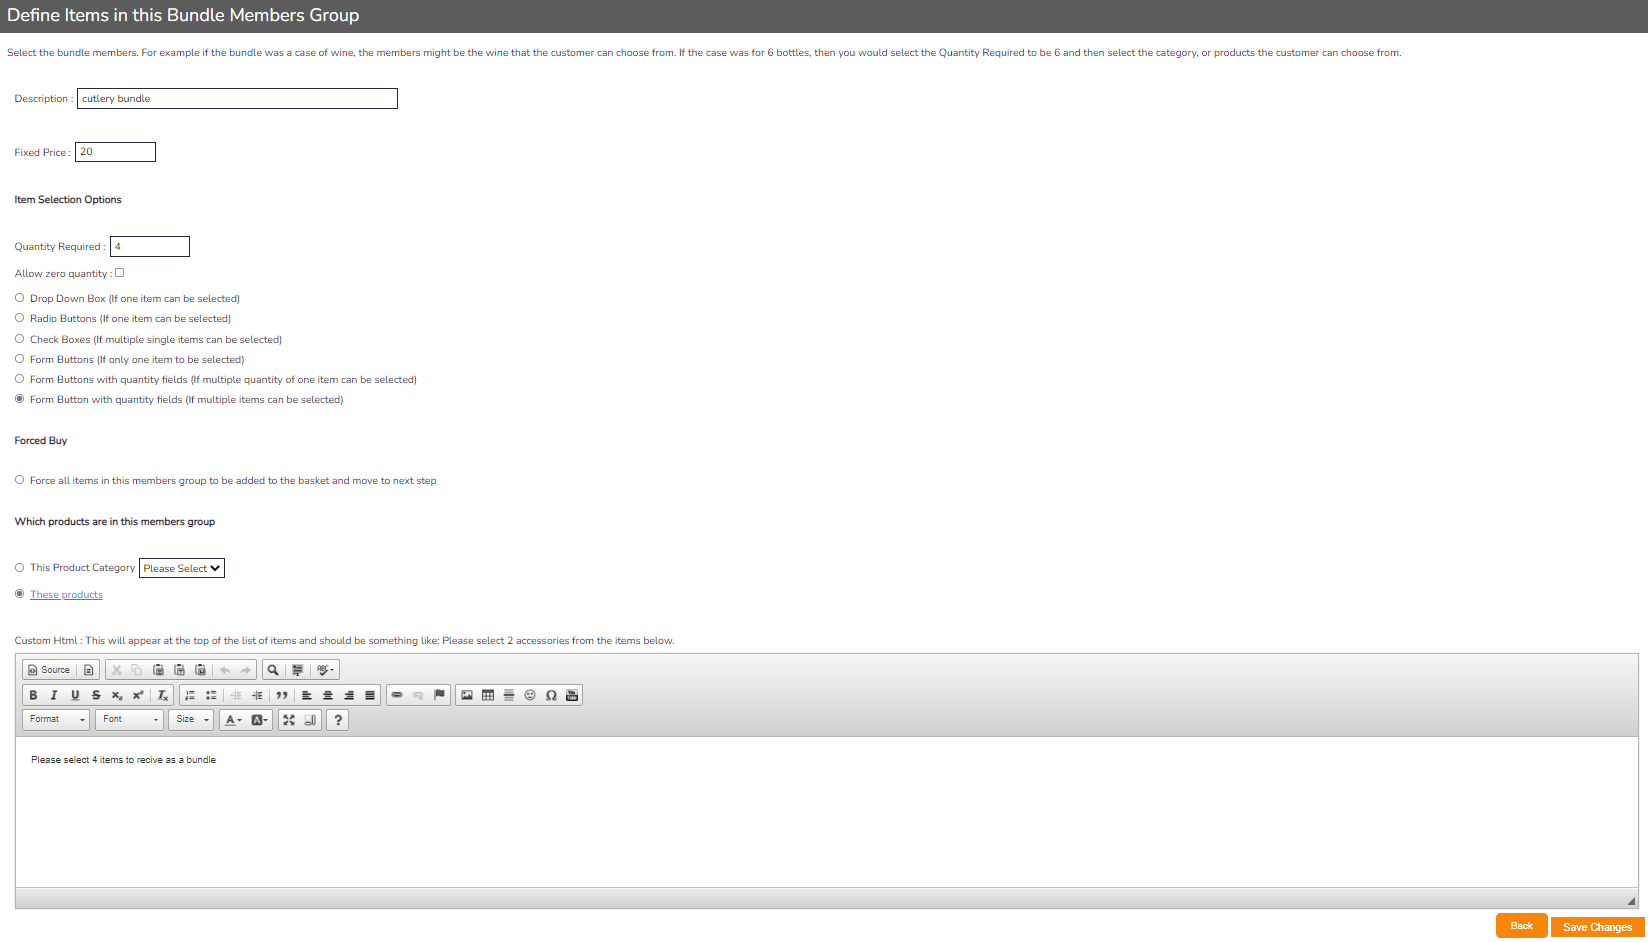
- On the next screen, you are able to begin adding items to the bundle. Press the Add new bundle member group to add some items:

- Read through each option carefully and decide what works best for the bundle you are trying to create. This example bundle will be triggered with specific items and so I selected the These Products optionand selected the itesm to add as group members. When you are happy with the set up, select the orange Save Changes button in the bottom right:
- Now we need to add the bundle attribute to each of the items that the bundle will apply to. Navigate to the Item Manager by looking to the left of the Admin Panel and selecting Manage > Items
- Once in the Item Manager, find the items that you previously added to the bundle and click the Item Code to bring up the items properties:
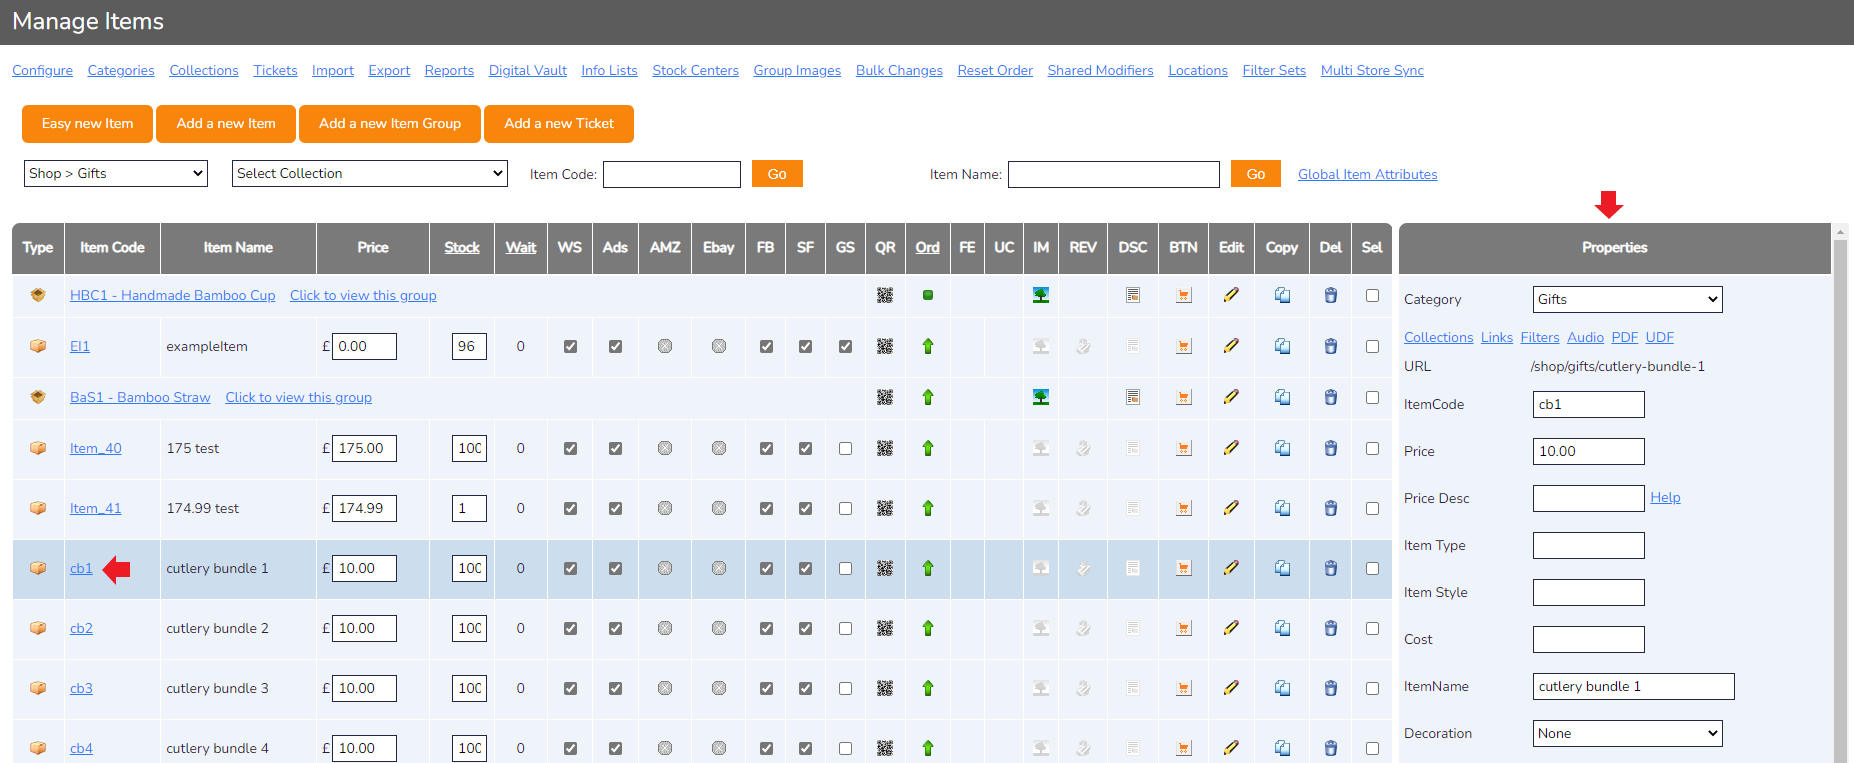
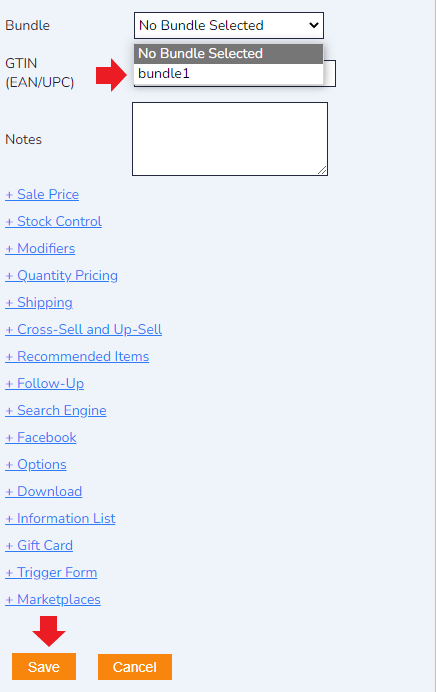
- In the Properties section, scroll down to find the Bundle drop down menu. Select your newly created bundle then scroll to the bottom to find the orange Save button:
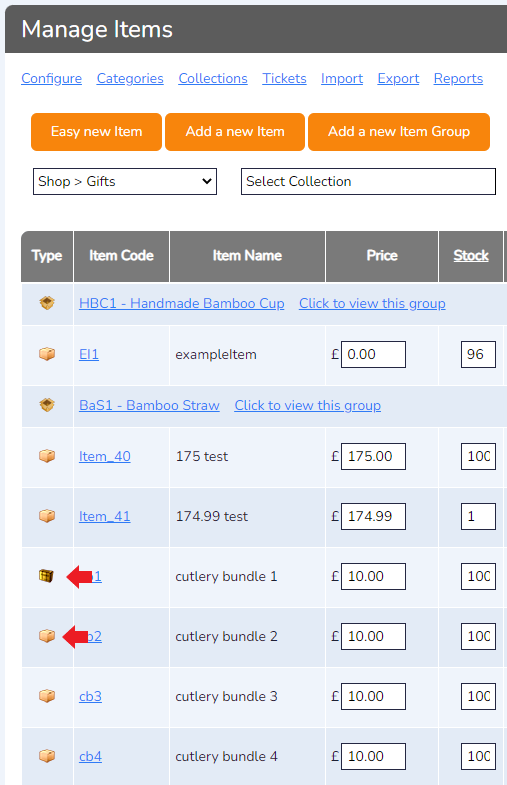
- You will be returned to the Item Manager. The item you just added to the bundle will have it's Type changed from a Cardboard Box to a Collection of Boxes:
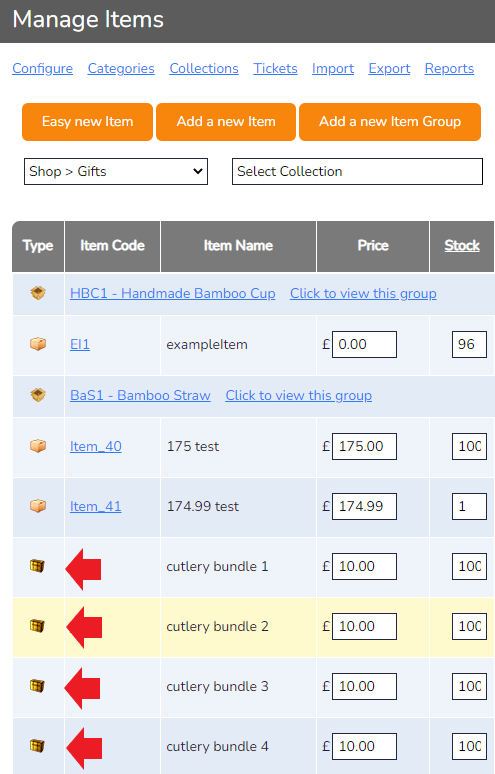
- Repeat the previous steps to add the Bundle Property to each of the items you want in the bundle. The Type of each item should all be the Collection of Boxes:
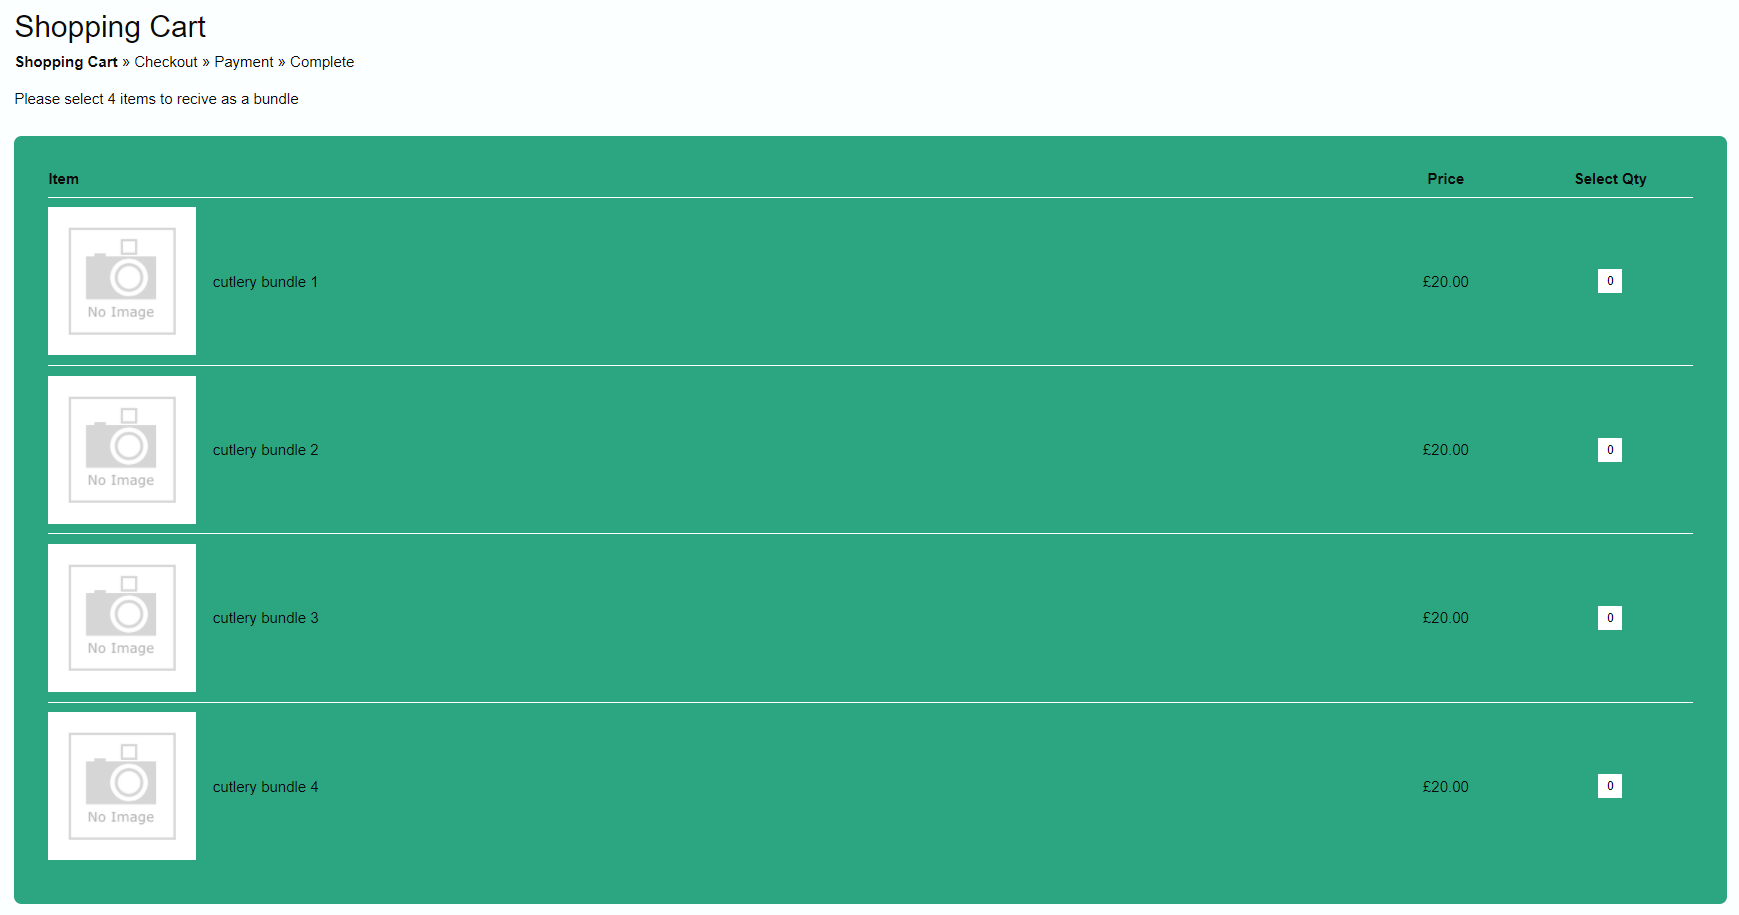
- Now, when the customer attempts to buy any of the defined items in the bundle, they will be taken to a similar screen to the one below where they can add up to the defined amount of available items to add to their bundle: