Intro to Sellr
Setting Up Your Ecommerce Store
Editing Your Ecommerce Store
The "Action" Section
The "Manage" Section
The "View" Section
The "Marketing" Section
The "Advertising" Section
The "Fulfilment" Section
The "Website" Section
The "Configure" Section
Migrating to Sellr
Selling in Person
Selling Online
Discounts and Promotions
Invoicing and Quotes
Items for Sale
Website Themes
Payments
Domains
Shipping
Managing Orders
Contact Management
Exporting Contacts From Your Ecommerce Online Store
Managing Contacts
Customer Accounts
Importing Contacts to your Ecommerce online store
Creating Contact Lists for Your Ecommerce Online Store
Tax Settings
Email Marketing
Telesales
Selling On Marketplaces
Selling On Social Media
Connecting to Other Systems
How to Increase Your Sales
Importing Contacts to your Ecommerce online store
Sellr has the option to import and export customer data and lists. You may be migrating to Sellr and want to add your existing customer data to you Sellr database, or you may need to export a list of customers for use with a different system or to create a type of guest list.
For all of these actions, we can use the import and export functions
To import a list of contacts into your ecommerce online store, please follow these steps:
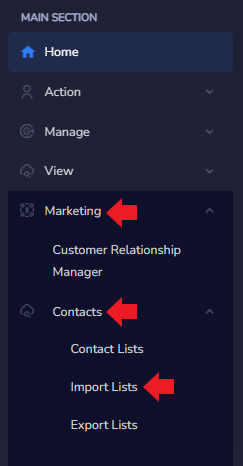
- To import a list of contacts, from the Admin Control Panel, select Marketing > Contacts > Import lists from the drop down menus:
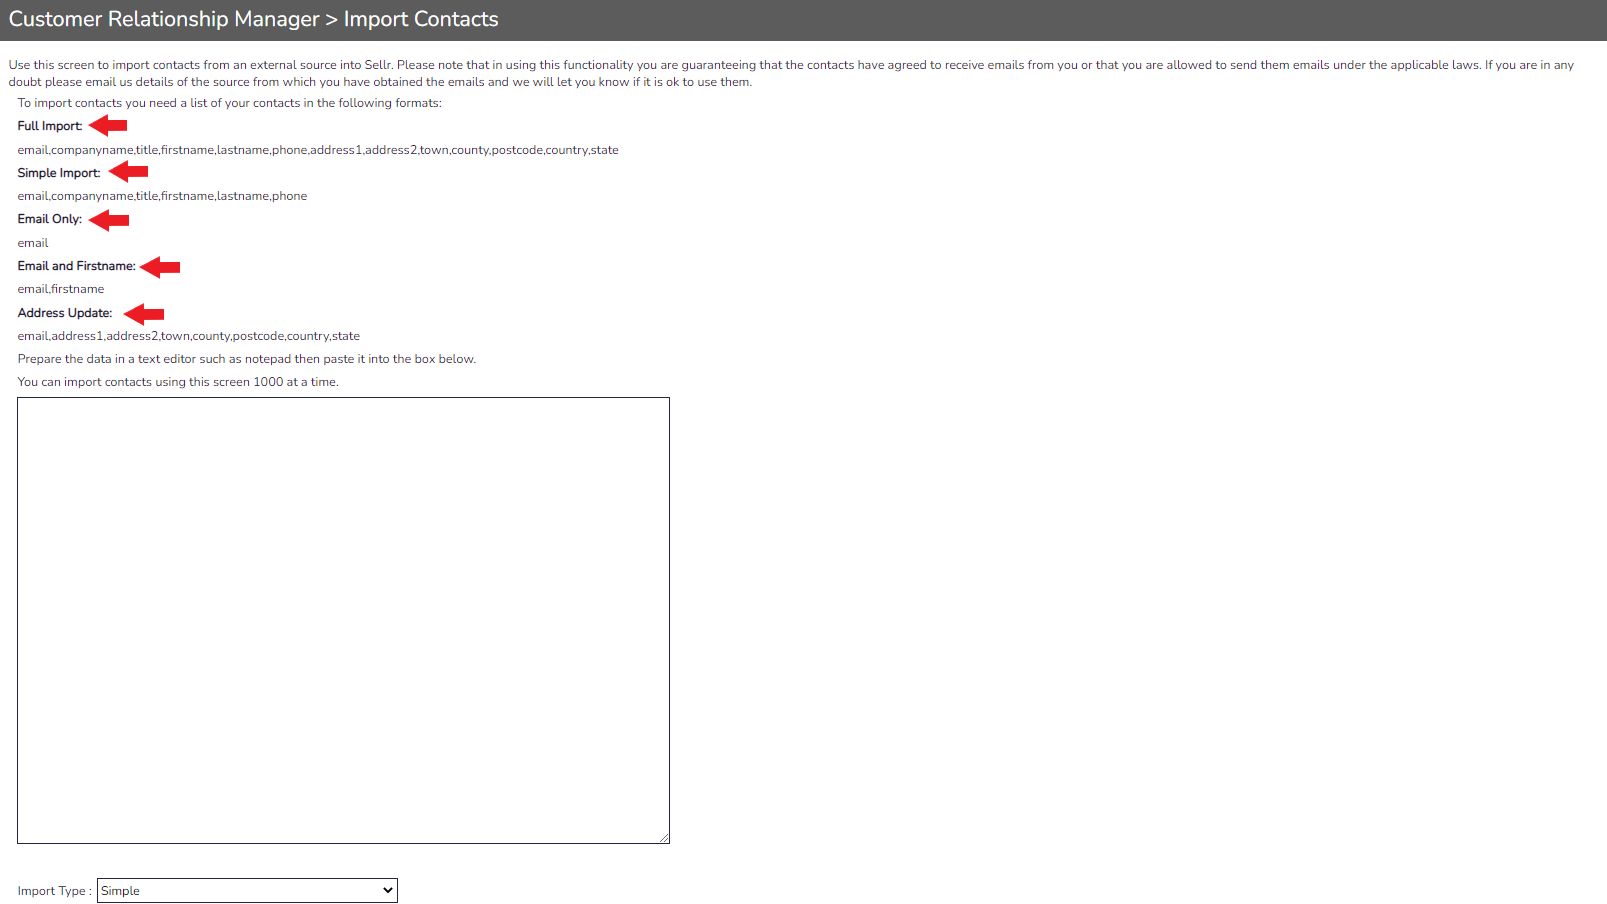
- The next page will show the Import manager that we will use to import our contacts. There are five different methods for importing your customer data, with each showing the type of information that can be included:
- Full Import = All information about a customer and their business
- Simple Import = Basic information about a customer and their business
- Email Only = only the customer's email
- Email and Firstname = A customers emails and firstname only
- Address Update = Simplified address information
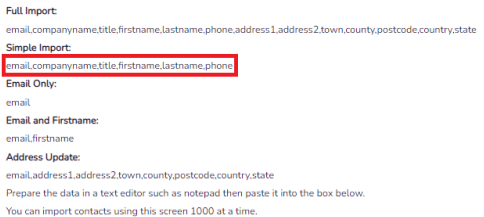
- For this example, we will add 2 contacts using the simple method. If we look at the information underneath Simple Import, we can see that it takes email, company name, title, first name, last name and their phone number:
- We will add each piece of information, delimiting (or separating) each piece of information with a comma (please note that there is no space needed after each comma):
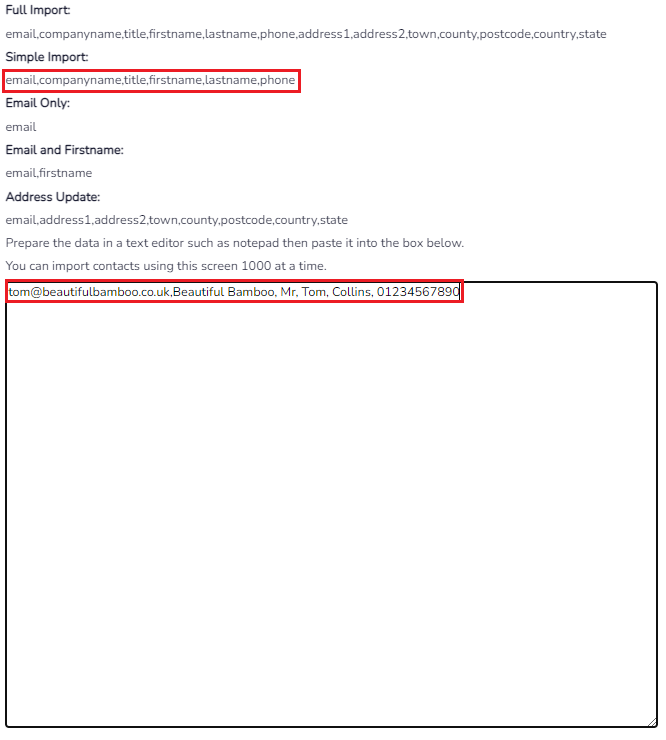
- Now we can add a second contact to import, by following adding the information on the line below our contact, Mr Tom Collins. Simply press the return key on your keyboard and input the relevant information:
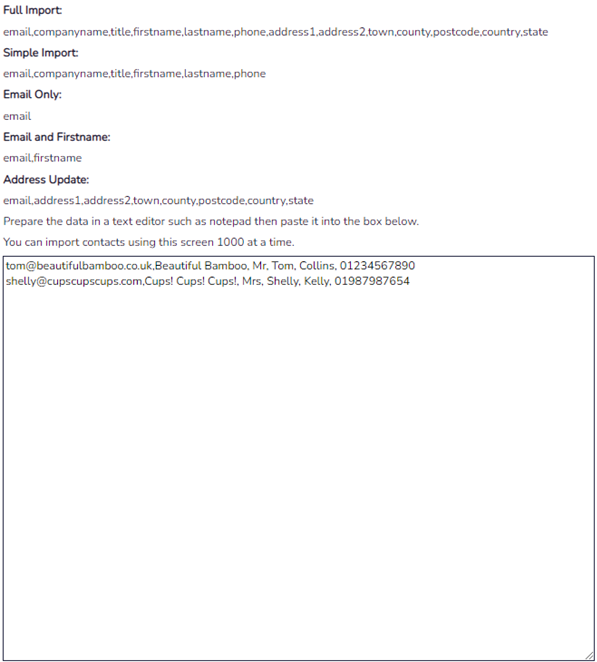
- When you have added all the contacts you want to, scroll further down the page and ensure the options are set correctly:
- Import Style = Drop down selection for the different import methods. Select the one that includes all the fields that you need
- Data is delimited by = Delimiting is simply the process of separating out different data values. Your import can be delimited by either a comma (,) or a vertical bar/pipe (|)
- Import Group = A group that contains the imported data. This will only have options available if you have already created a group
- New Group Name = Provide a name for the group of imports
- For this example, I will leave Import Style and Data is delimited by as they are but will create a New Group Name for these particular contacts to be organised in. Once everything is set how we would like it, we can press the orange Import button in the bottom right:

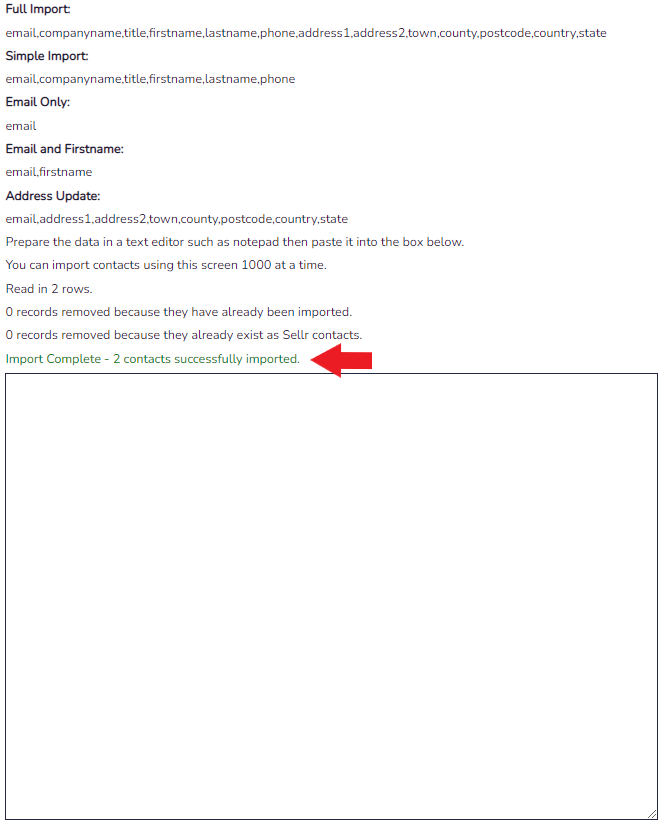
- A green line of text will inform you of the successful import of contacts. If this line is red, it means that some of the information was input incorrectly. Check that the data you have input follows the layout in the method you chose:
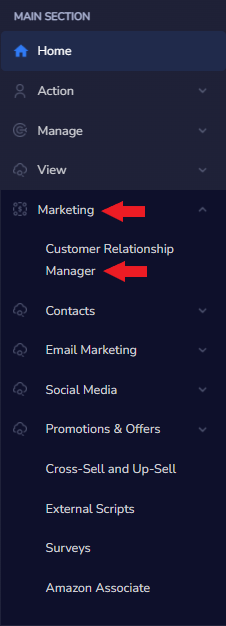
- To check that your contacts were imported, check the CRM. Look to the left and select Marketing > Customer Relationship Manager
- Select the Show drop down menu and select the group that you created when importing the contacts:


