Intro to Sellr
Setting Up Your Ecommerce Store
Editing Your Ecommerce Store
The "Action" Section
The "Manage" Section
Sales
Sales by Type
Items - Add Easy Item
Item Manager - Other Available Options
Invoices / Pro Formas / Quotes
Cart Preloader
The "View" Section
The "Marketing" Section
The "Advertising" Section
The "Fulfilment" Section
The "Website" Section
The "Configure" Section
Migrating to Sellr
Selling in Person
Selling Online
Discounts and Promotions
Invoicing and Quotes
Items for Sale
Website Themes
Payments
Domains
Shipping
Managing Orders
Contact Management
Tax Settings
Email Marketing
Telesales
Selling On Marketplaces
Selling On Social Media
Connecting to Other Systems
How to Increase Your Sales
Items - Add Easy Item
The core of any store are the items sold. On Sellr, the item manager is where you add, remove, adjust the price and add images to the products that you sell on your store.
Adding items is made very simple and provides you with various options to manage your inventory. This page will describe how to add a new item using the Easy New Item feature
To add a new item, follow these steps:
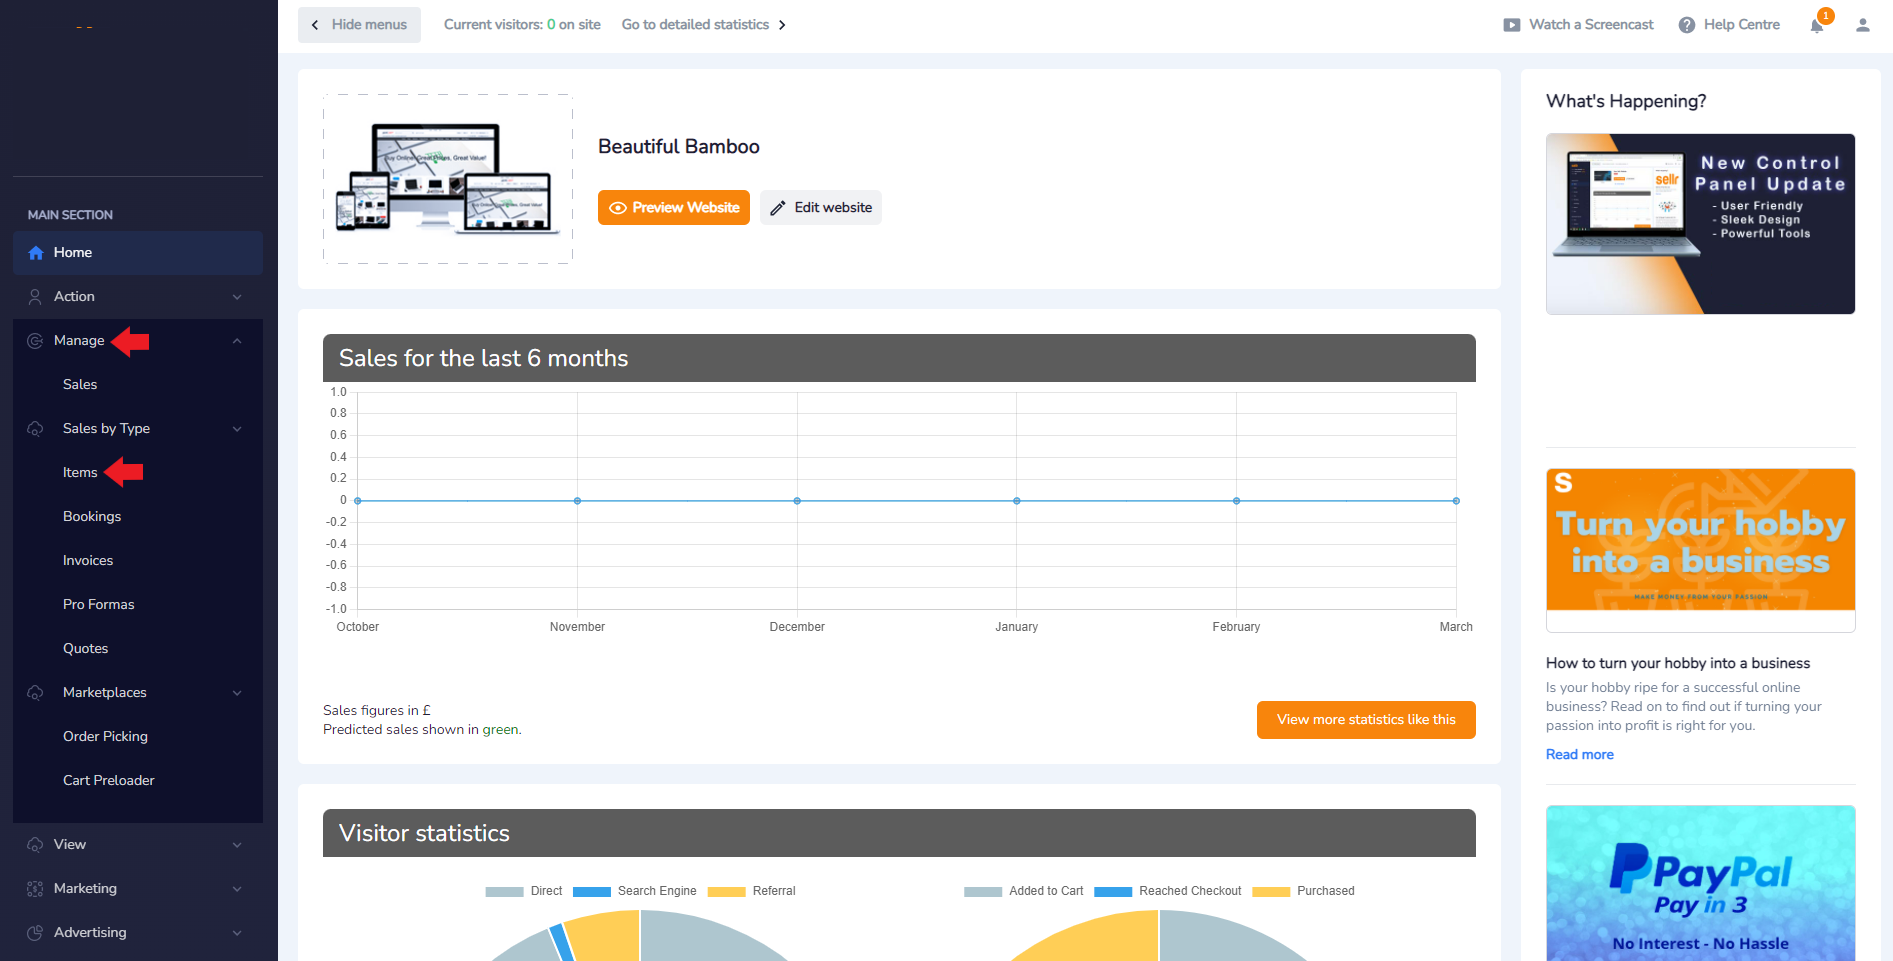
- From the Admin Panel, look to the left and select Manage > Items:
- The next screen will show the Item Manager. Select Easy New Item:

- On the next screen, you can begin building the item by filling in the required details:
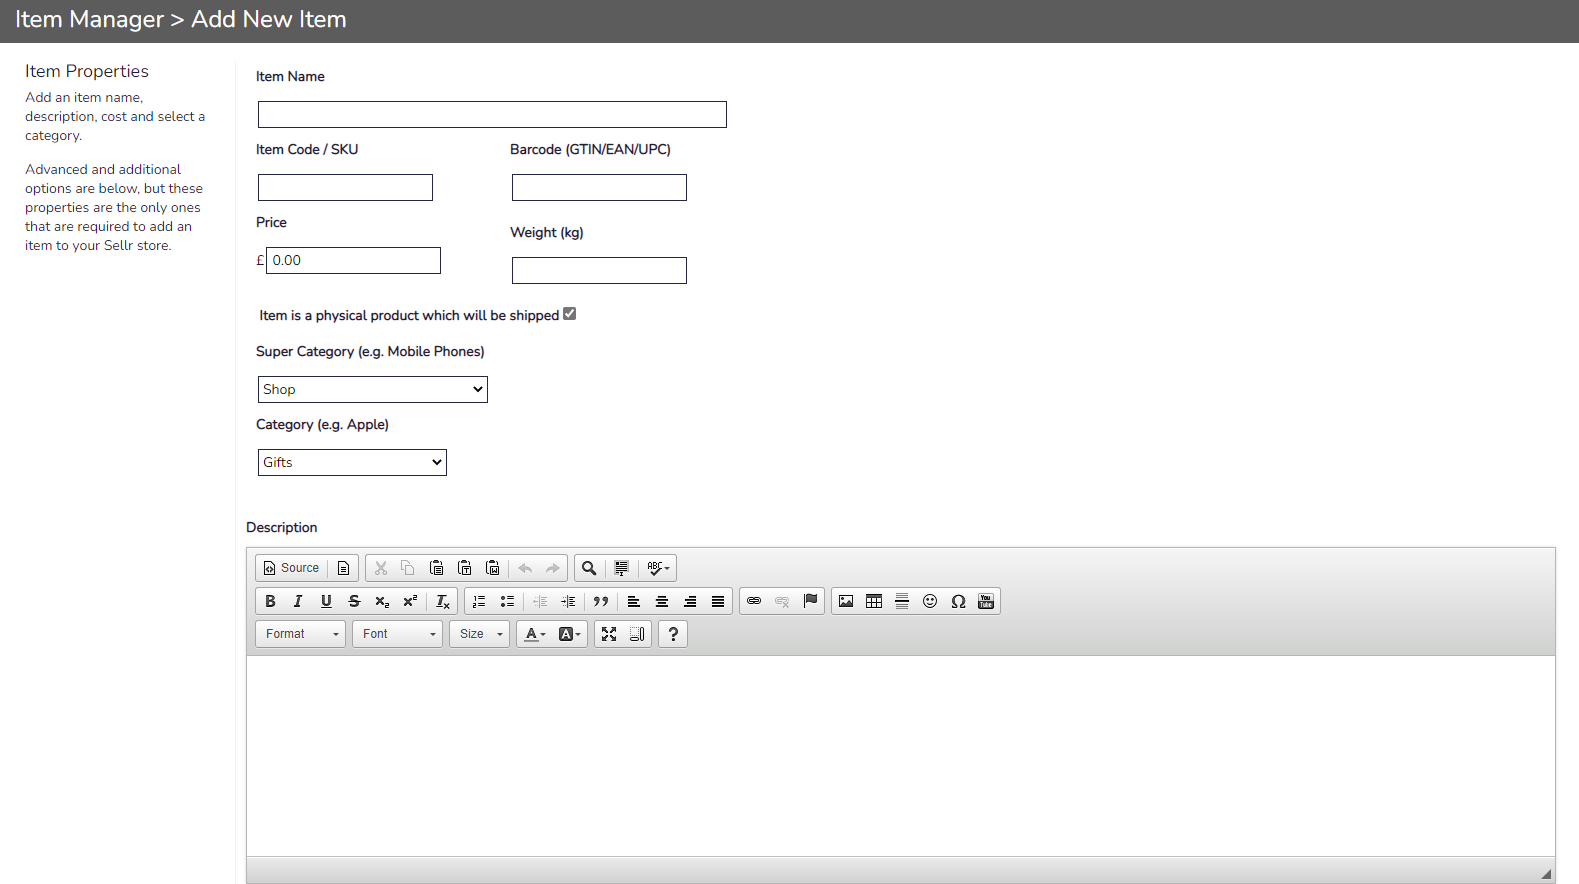
- I will add a new item to my store. The item is a bamboo straw. Fill in the Item Name section:

- Provide an Item Code:

- Provide a Barcode (if needed):

- Set the Price of the item:

- Set the Weight of the item. This is important if you will be using Weight Based Shipping:

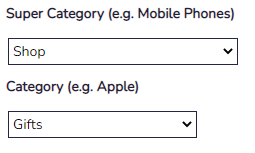
- Use the drop down menu to select the Super Category and the Category. Super Caterogies are used to order Categories. For example, you may sell mobile phones (Super Category) and have different models or types such as Android or Apple (Category):
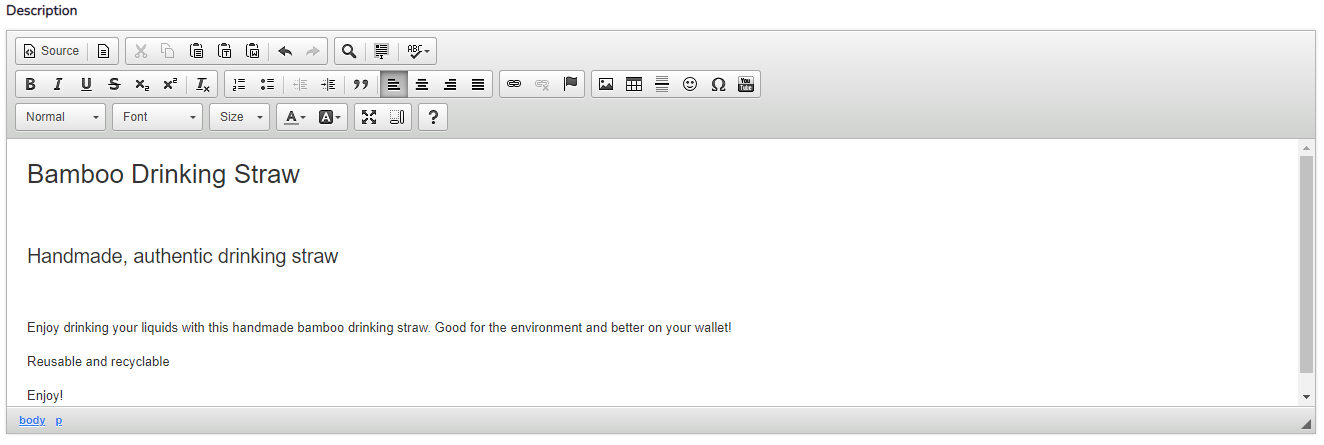
- Write the description for your item. You can include images, links to other sites and videos. You can write the description using plain text or HTML. You can use the toolbar to format the text and add pictures just like using Microsoft Word. Hover your mouse cursor over any icon on the description toolbar to see what each icon does:
- Select the Collections that this item will be a part of (if you would like it to be part of a Collection). Select a Collection and then press the single chevron (
 ) to add the item to that specific Collection. Alternatively, you can press the double chevron (
  ) to add the item to all Collections

- If you would like this item to be subject to Inventory Control, enable to option and provide the quantity. You can also choose if this item will be available to purchase when it is out of stock:

- If the item has variations (such as size or colour, for example) then tick the box that says Tick if this item has variations to add the variations:
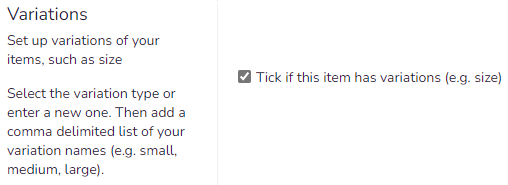
- Provide a Variation type in the text field under Variation Name and then add each variant into the text box under Variation Values:

- A new set of options will appear if you chose to inculde Variants. From here, you can fine tune each of the variants. Perhaps one of the variants ends up costing more to produce and therefore needs to be sold for more than the base item. You can adjust these options in this section if needed. The system will automatically assume the options are all the same for the Variants unless overridden using this menu:

- Finally, you can upload an image that will be shown on the product page. Select Choose file and then locate the image you would like to use. Please note the size requirements:

- Press the orange Save button in the bottom right once you are happy with the item. The item will be immediately uploaded to your online store. You will be redirected to the Item Manager where you can view the new Item:

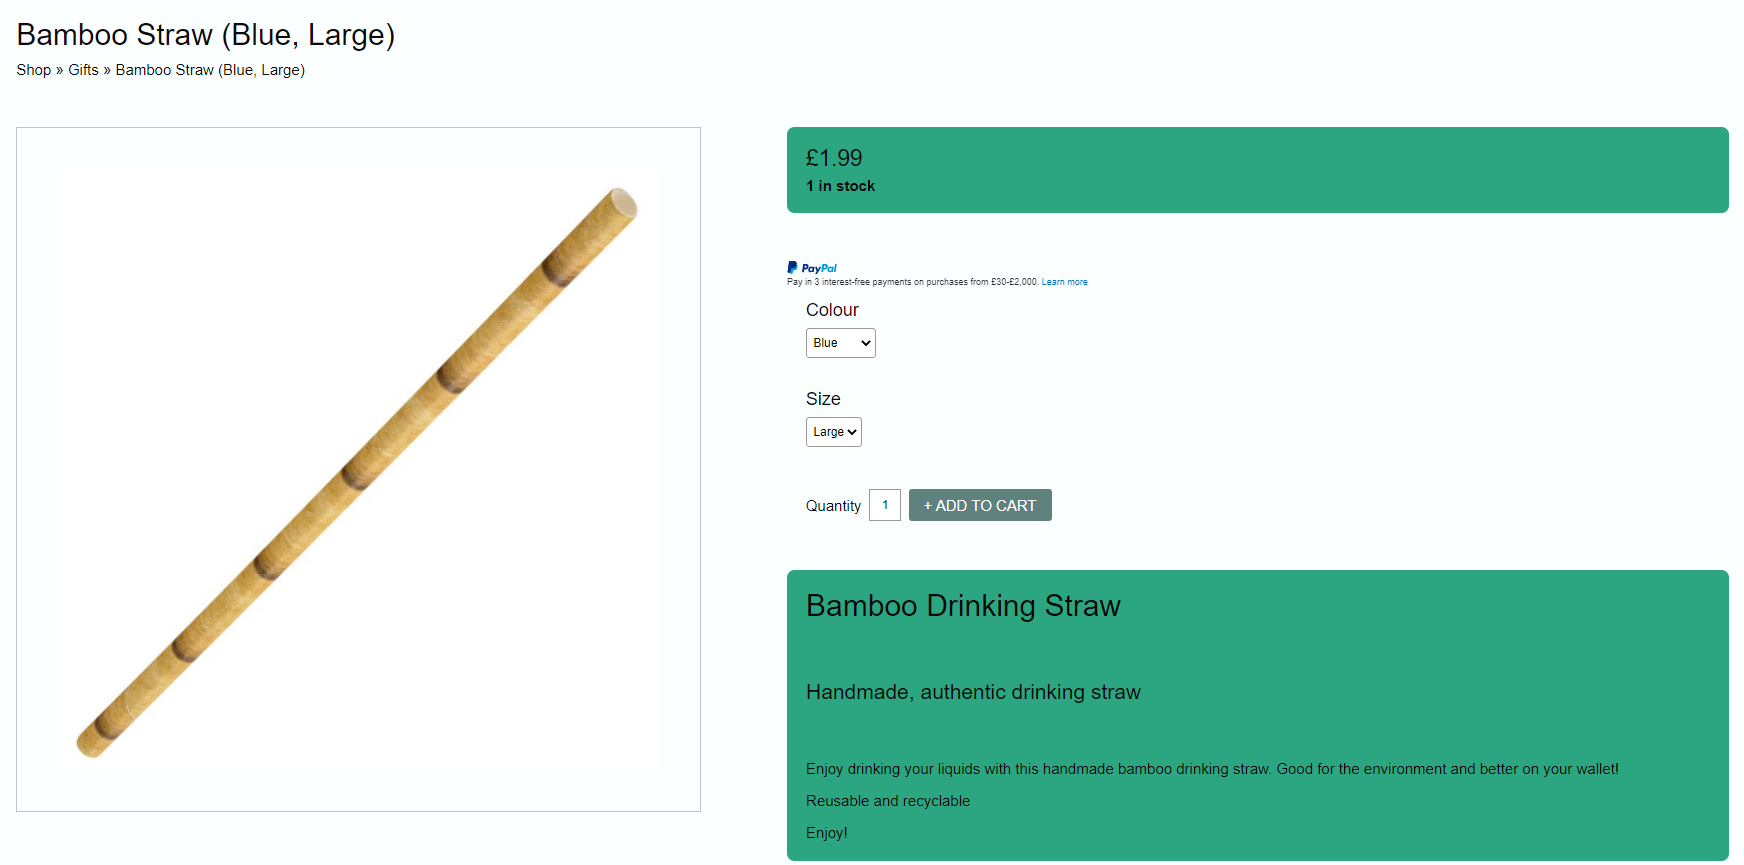
- You can check how the new item looks by navigating to your online store:
- If you need to edit the item at any point, simply return to the Item Manager (Admin Panel > Manage > Items) and selecting the Pencil icon in line with item you wish to edit:


