
Website Domain Name
This topic has already been covered in a previous post which you can read here. It is repeated here for ease of access
DNS and domain names are often misunderstood and can be quite confusing.
For the purposes of your store, you don't need to understand how or why it works but you will want to purchase a domain name that is catchy, memorable and related to the name of your store or business.
Once you have purchased or secured a domain name, you can then link it to your store. This means that when customers visit your store, they will be able to type www.yourcompany.com instead of www.564738.sellrstores.com
One is obviously easier to remember than the other as well as reinforcing your brand in your customers mind. This process can be quite daunting but is fairly straightforward. The general flow of the process is:
- Search for domain name
- Purchase domain name
- Connect domain name
- Add DNS records to our preferred DNS resolution service (Cloudflare)
- Change the NS (Name Server) records
To purchase your domain name and connect it to your store, follow these steps:
- Use a domain registrar to search for your preferred domain name and see if it is available.
- There are many services to do this such as www.sedo.com, www.names.co.uk or www.godaddy.com
- Search around to find the best price and domain name
- I used www.names.co.uk to find the domain name I will use
-
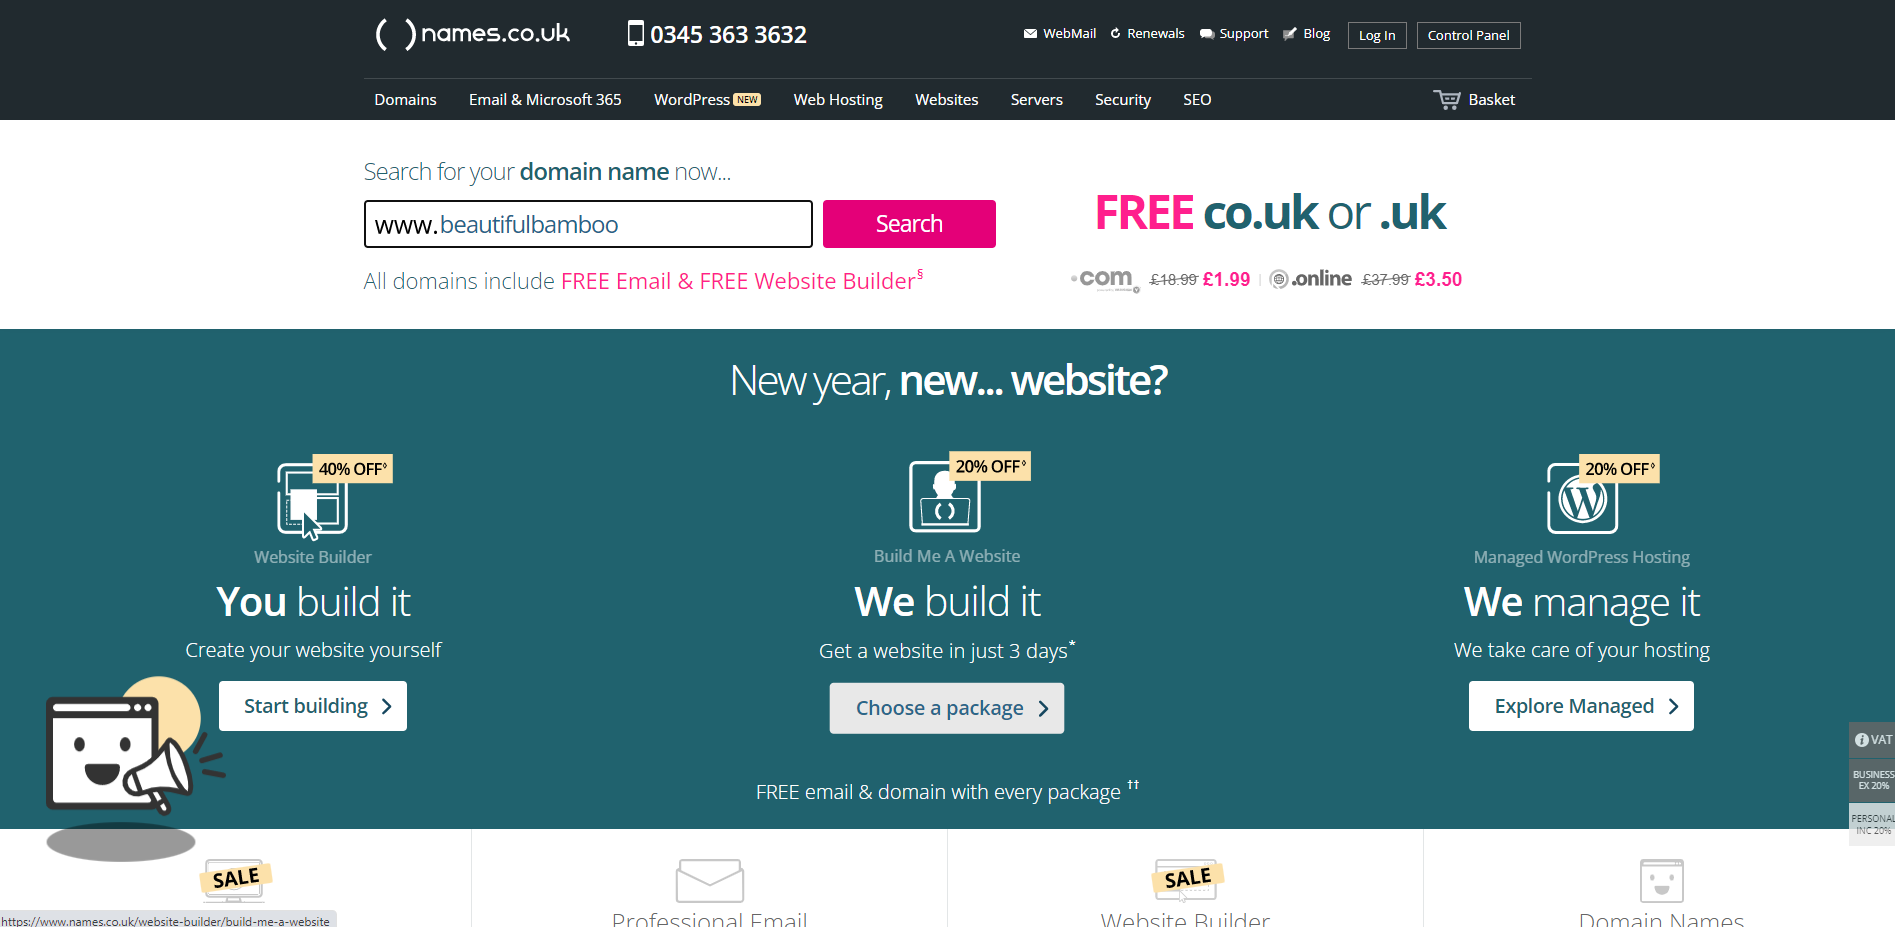
Use the search function to find the domain that you would like. I want "beautifulbamboo.co.uk" to ensure that my store name and brand are consistent:
-
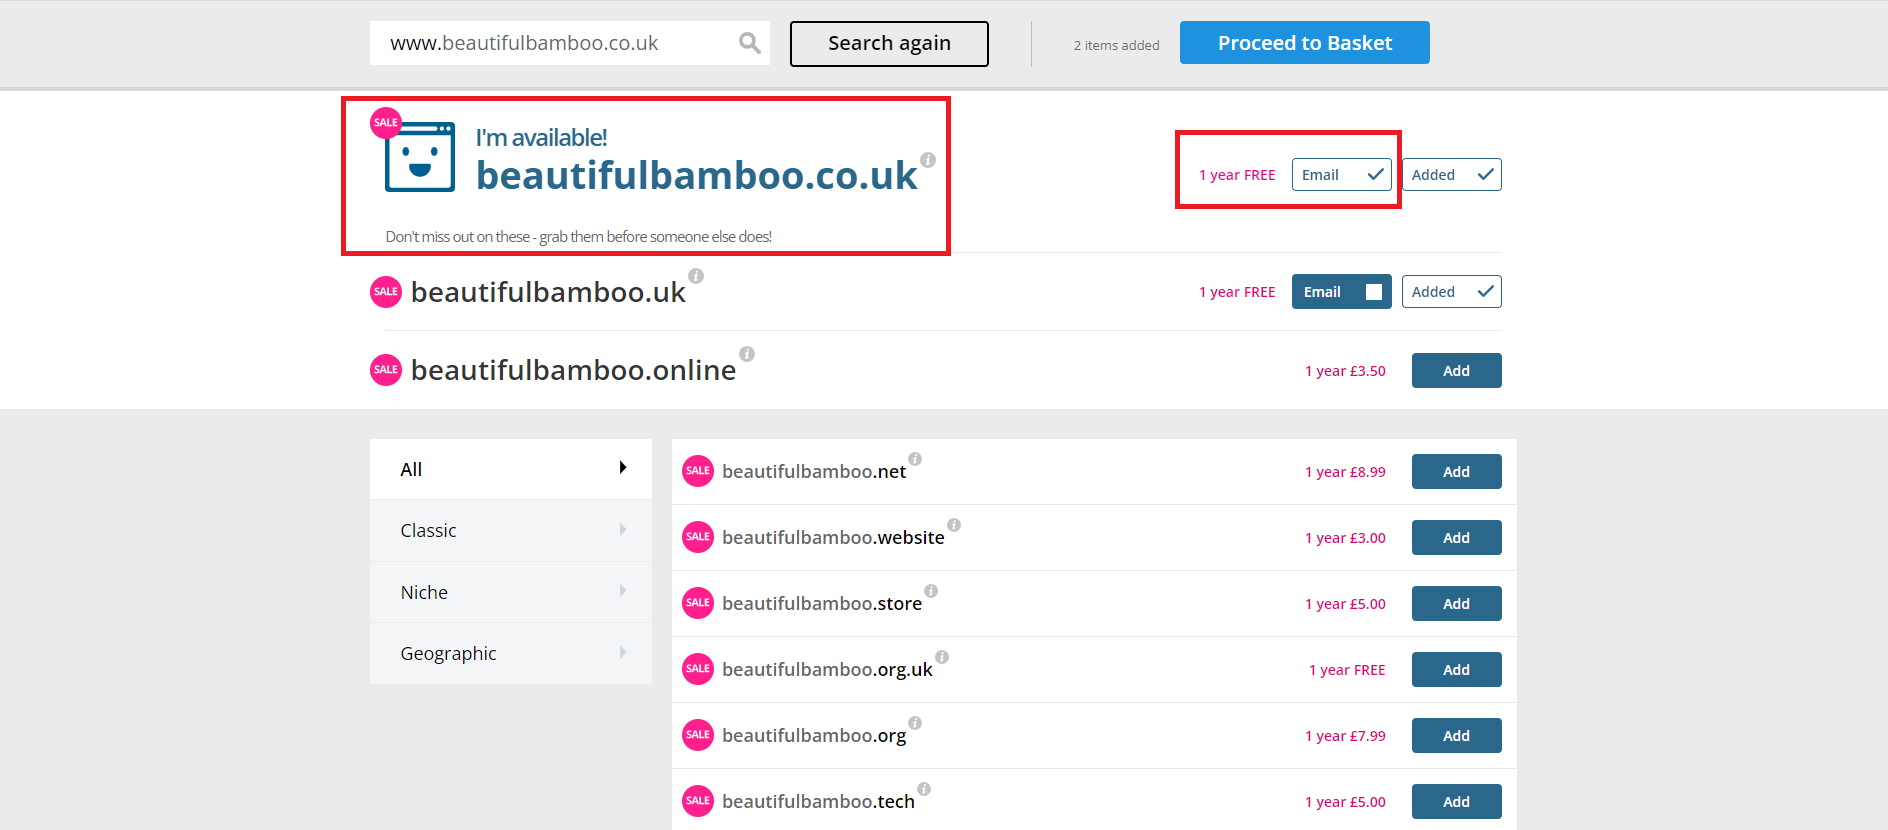
After pressing the Search button, I am presented with a list of available domain names. This includes different TLD (Top level domains) such as .com, .co.uk, .uk etc. Choose what works best for you and your location:
-
Luckily for me, beautifulbamboo.co.uk is free! This system has automatically added email hosting. This is something you may or may not want. This basically means that you will be able to create an email address with your domain name as well, further solidifying your brand. There are other ways to do this and is something you should look into yourself to see what works best for you. For now though, I do not want email hosting and will uncheck the box on the right that says "Email" and then the blue "Proceed To Basket" button in the top right
-
-
Many of these sites automatically add extras to your order. They can be useful add-ons depending on your situation. Some will be added security, insurance, extra domain names bundled in etc. Look at each carefully and decide what works for you in your situation. For myself, in terms of this demonstration, I do not want any of the add-ons and will also have to turn off Auto-recurring payments so that I do not get charged at the end of the 1 year that I have purchased the domain for. Auto-recurring payment options are generally located in each sites "Your profile/account" section. Each site is different so take a look at their documentation if you wish to turn off this feature. The bonus of having "Auto-recurring payment" enabled is that you are guaranteed no disruption in service if you forgot in one year to pay on time
-
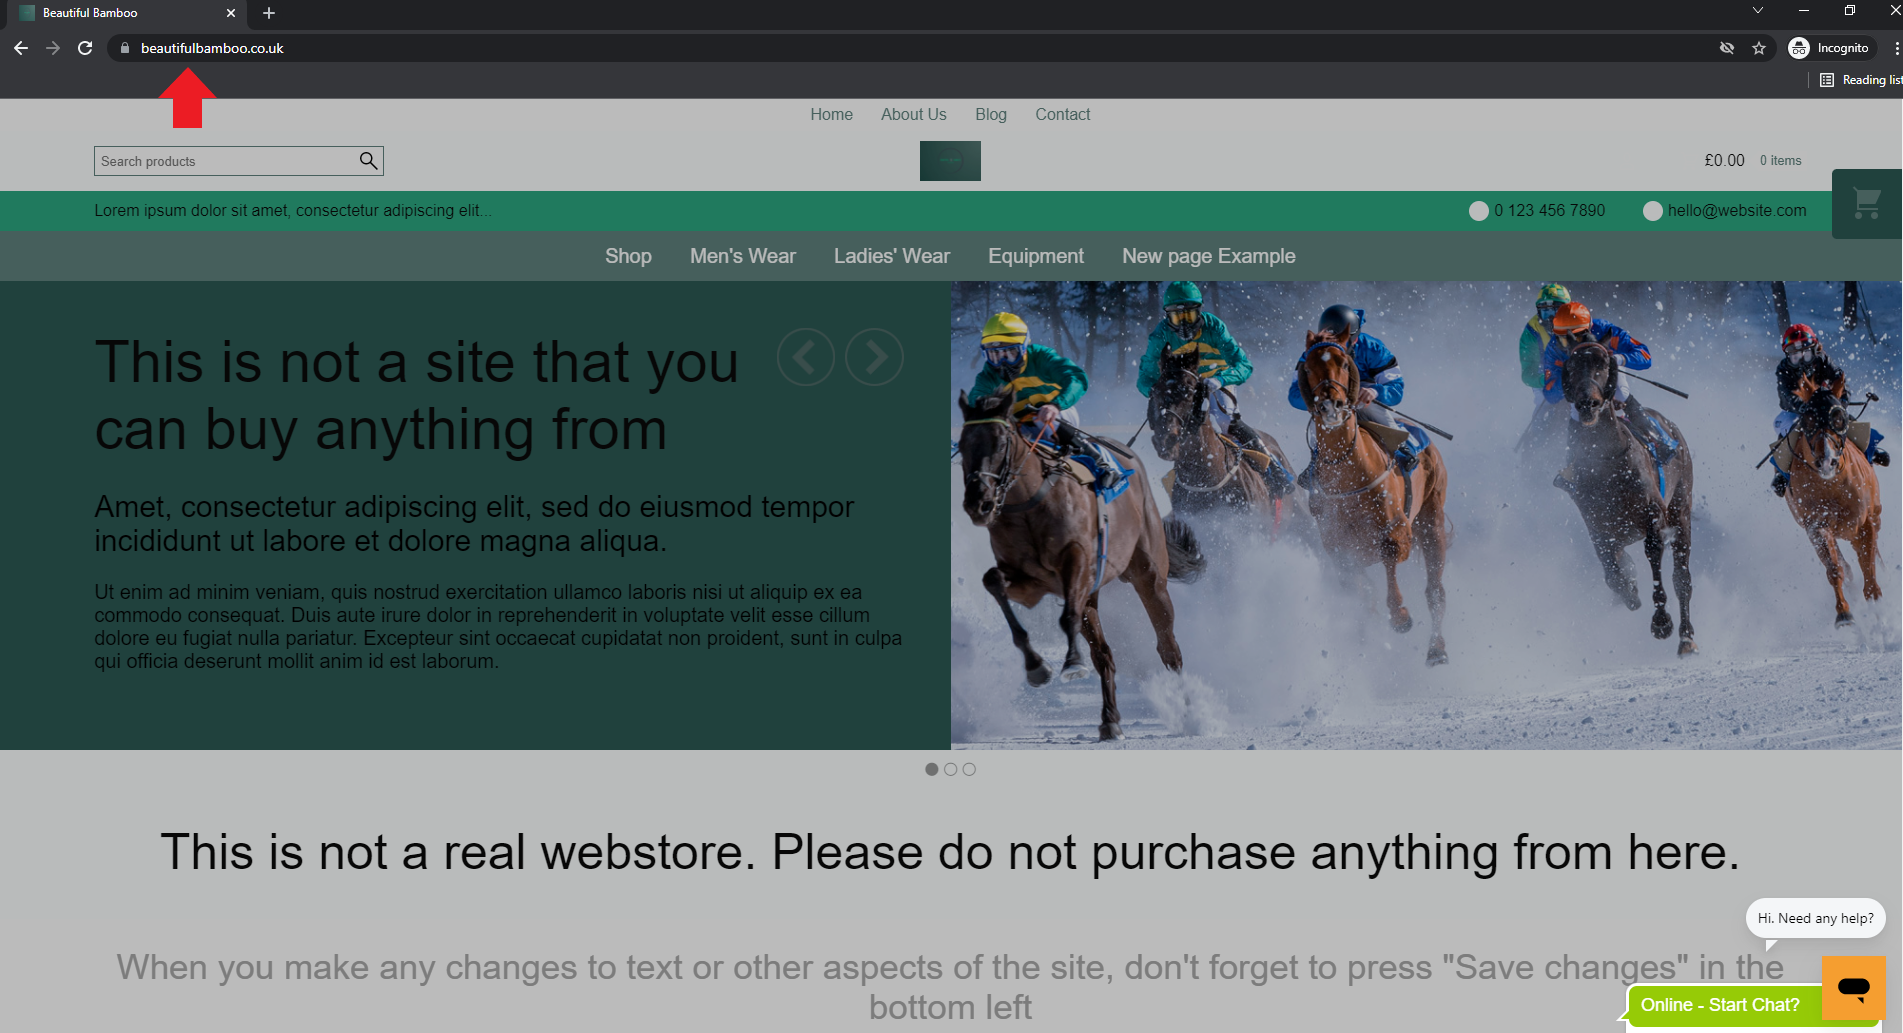
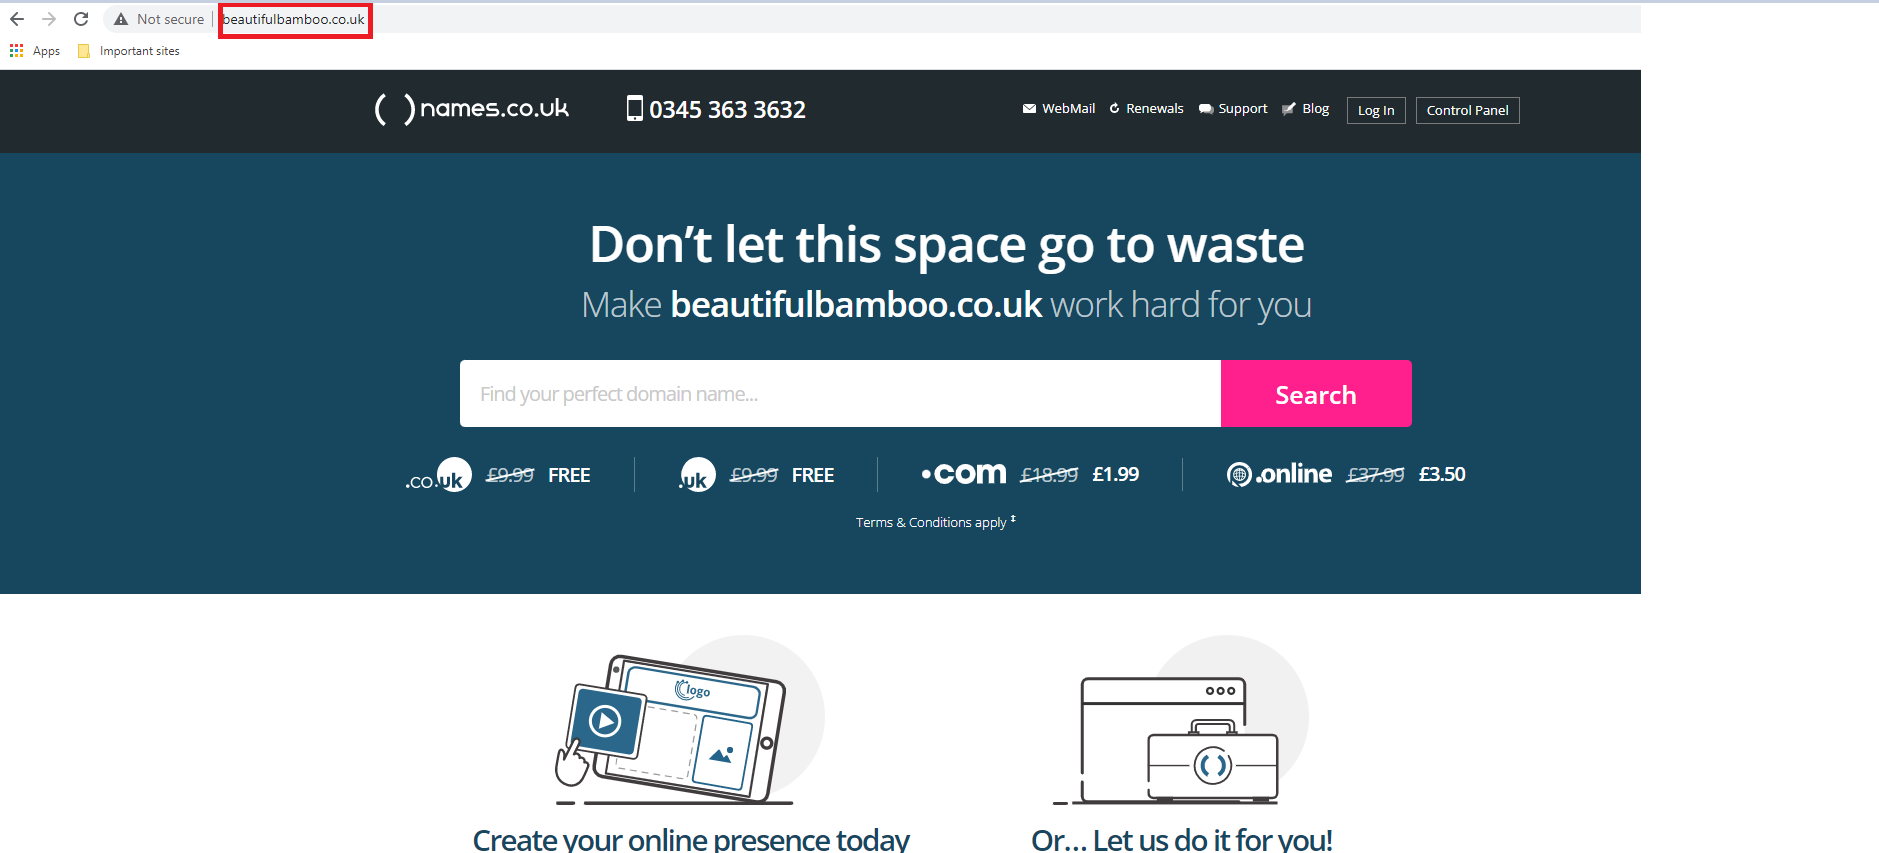
Once I have purchased the Domain Name from the Domain Host, the domain is now mine to connect to various different things. At the moment, if I type www.beautifulbamboo.co.uk into the address bar, this is what I see. This is because I have not published the correct DNS records:
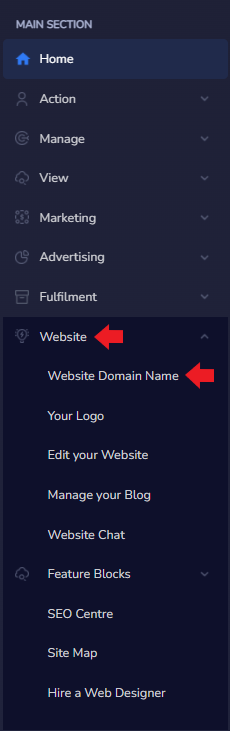
- Return to your Admin Centre. On the left of the screen select Website then Website Domain name:
-
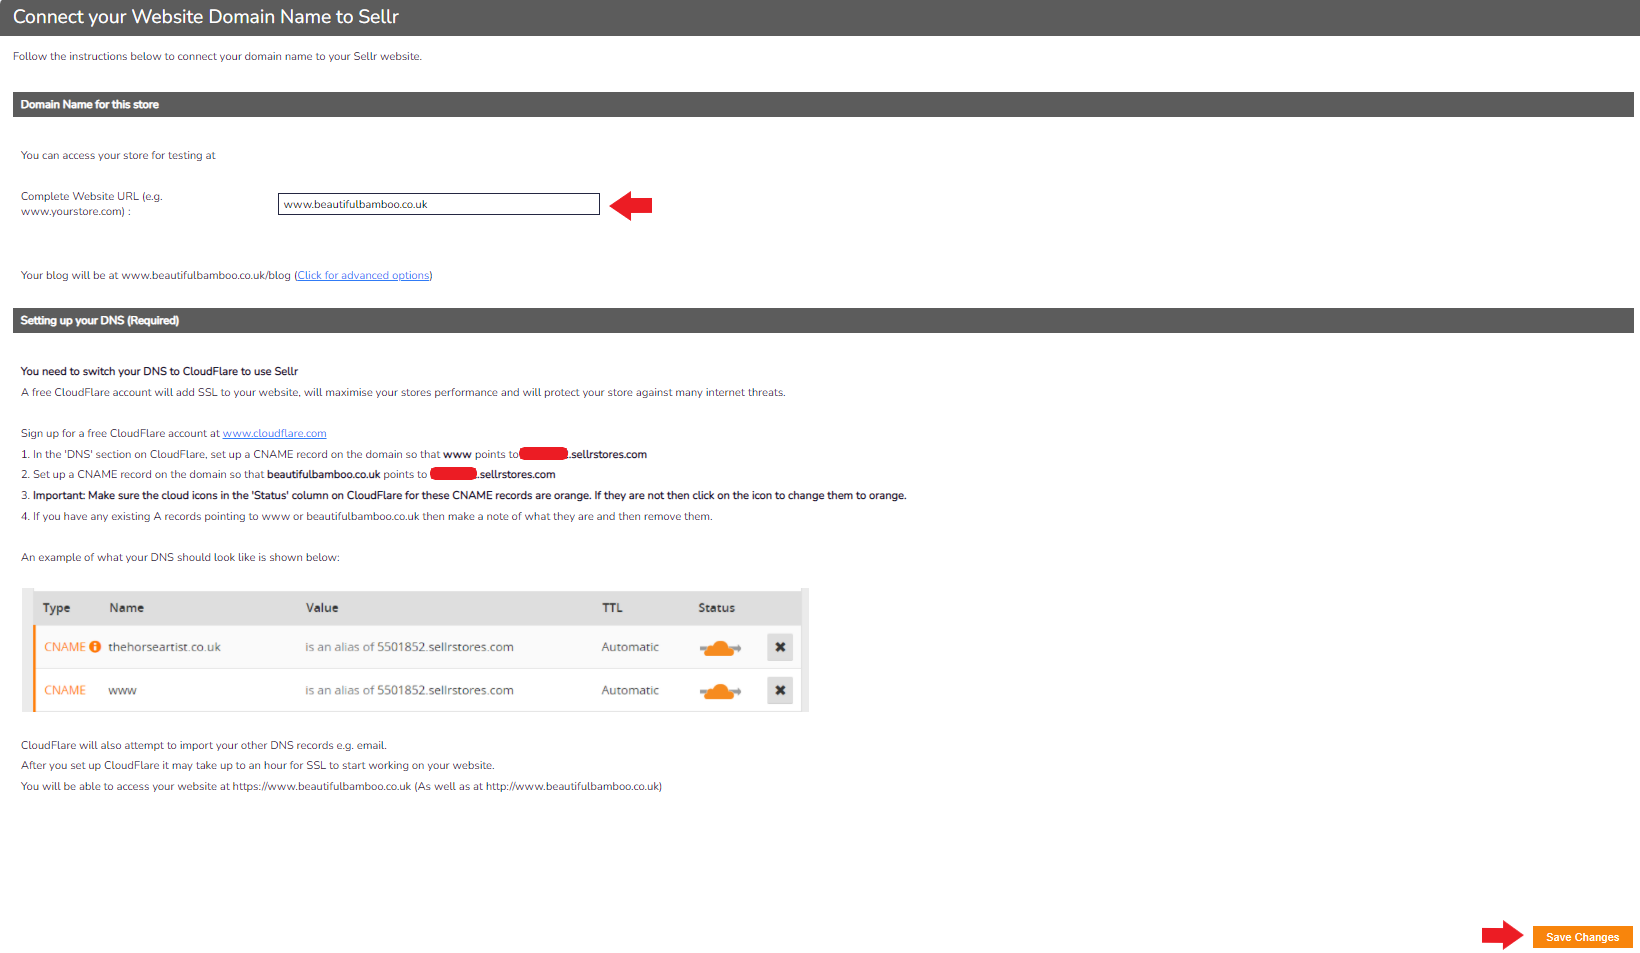
Type your new domain name into the space labelled Complete website URL. In my case, this will be www.beautifulbamboo.co.uk. Once you have entered your complete website URL, press the orange Save Changes button in the bottom right:
-
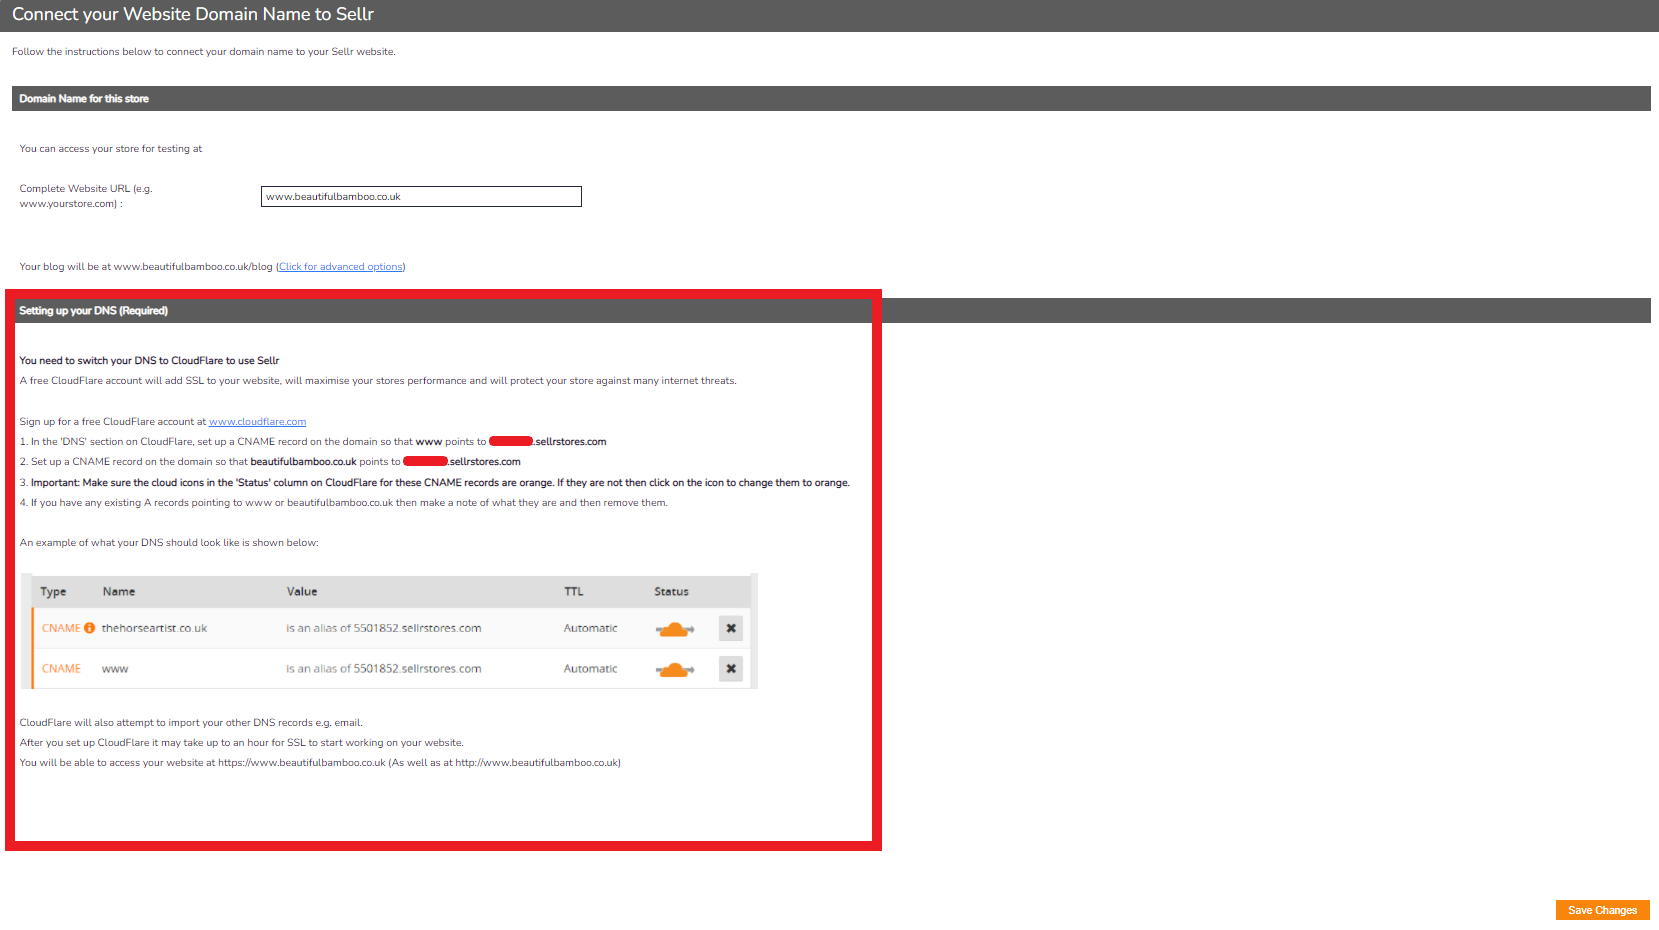
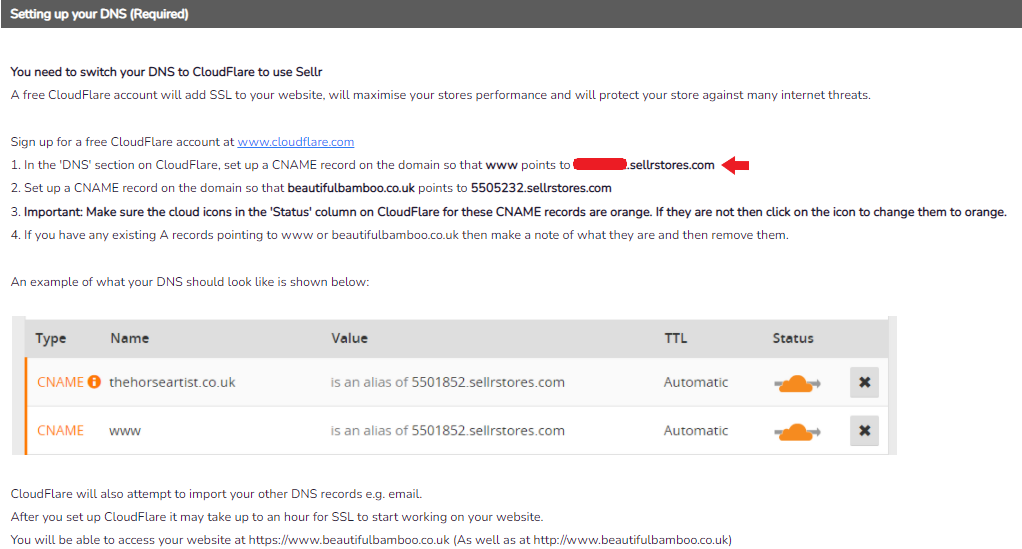
The system will then update and present you with step by step instructions on what to do next. Take a note of steps 1 and 2 below as they will be essential later:
-
The first step is to sign up for a free account at www.cloudflare.com. Go ahead and click the link to Cloudflare to set up an account
-
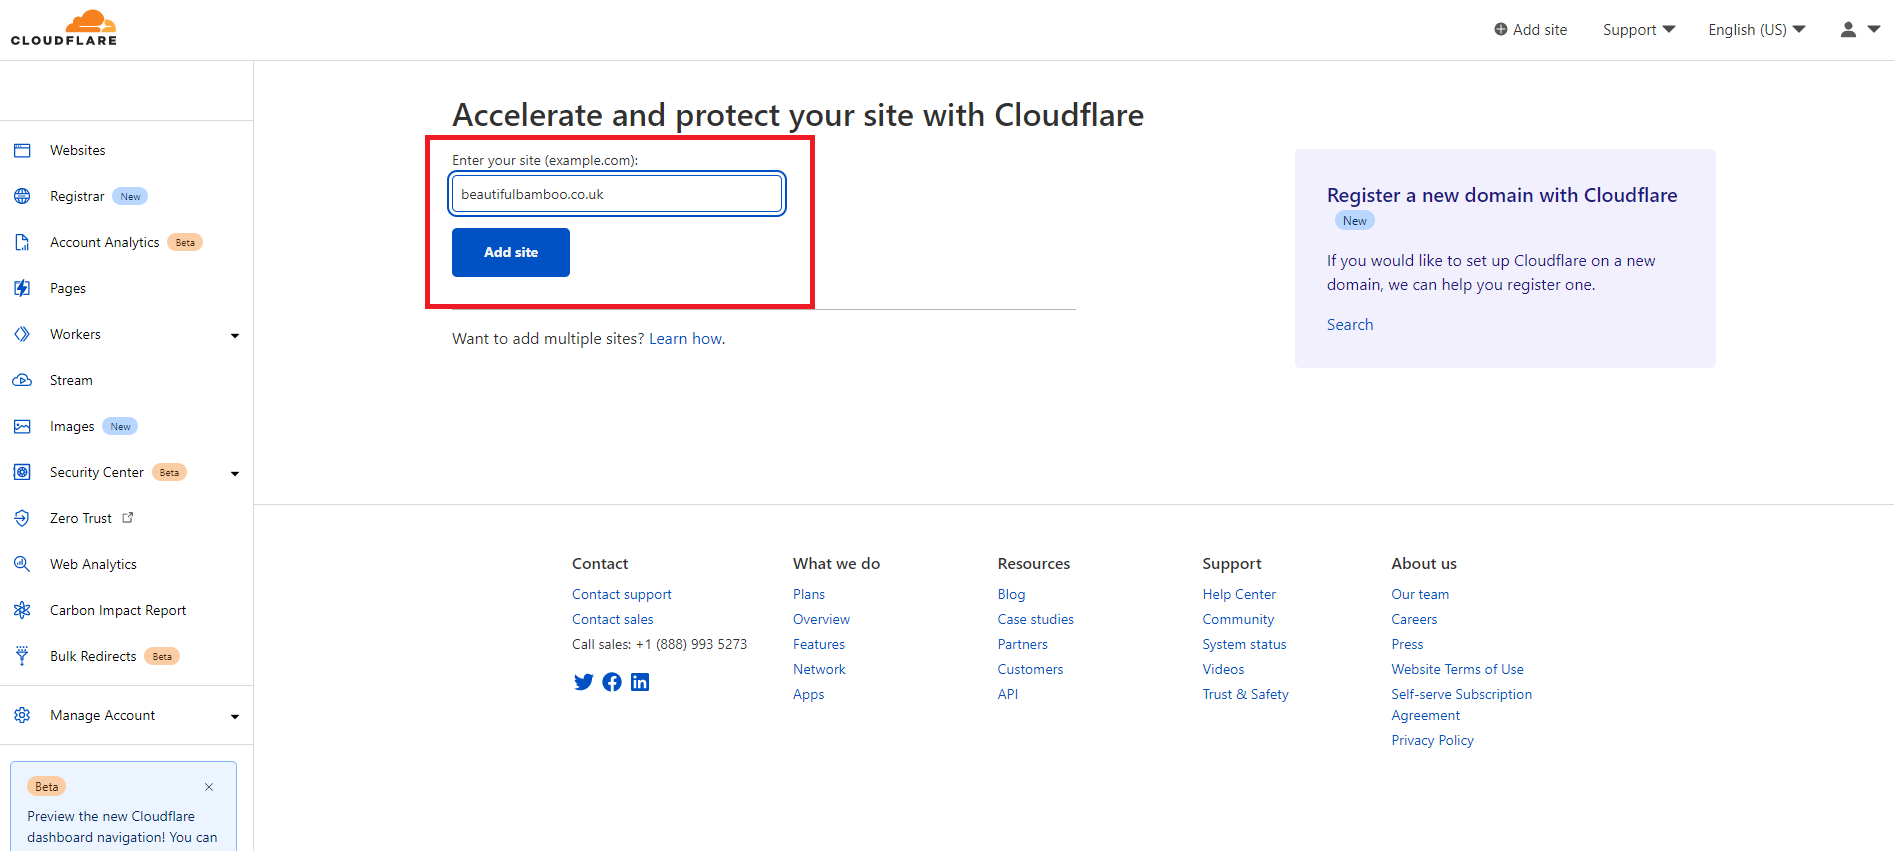
Once you have created your account, login. From the home page it will show all the domains that are attached to your account and managed by Cloudflare. I have 2 already here that I have hidden behind the red boxes. To add my newly purchased domain, I will click the blue + add a site button:

-
On the next screen, add your domain and click Add Site:
-
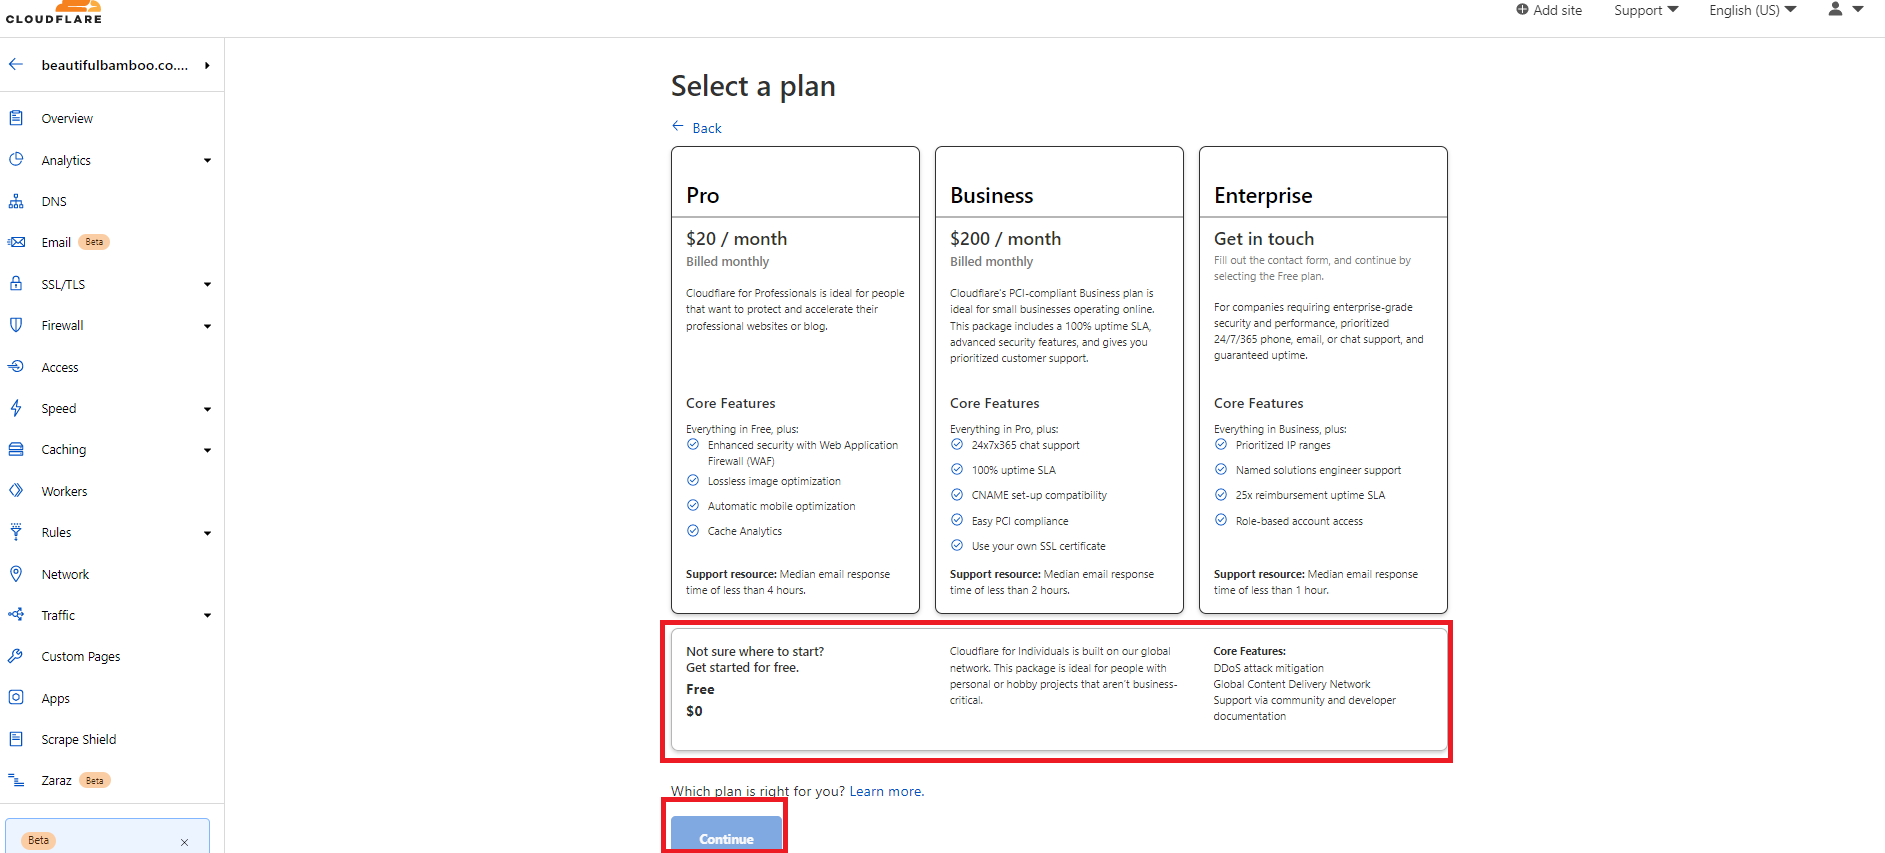
Next, select the free hosting option and press the blue Continue button:
-
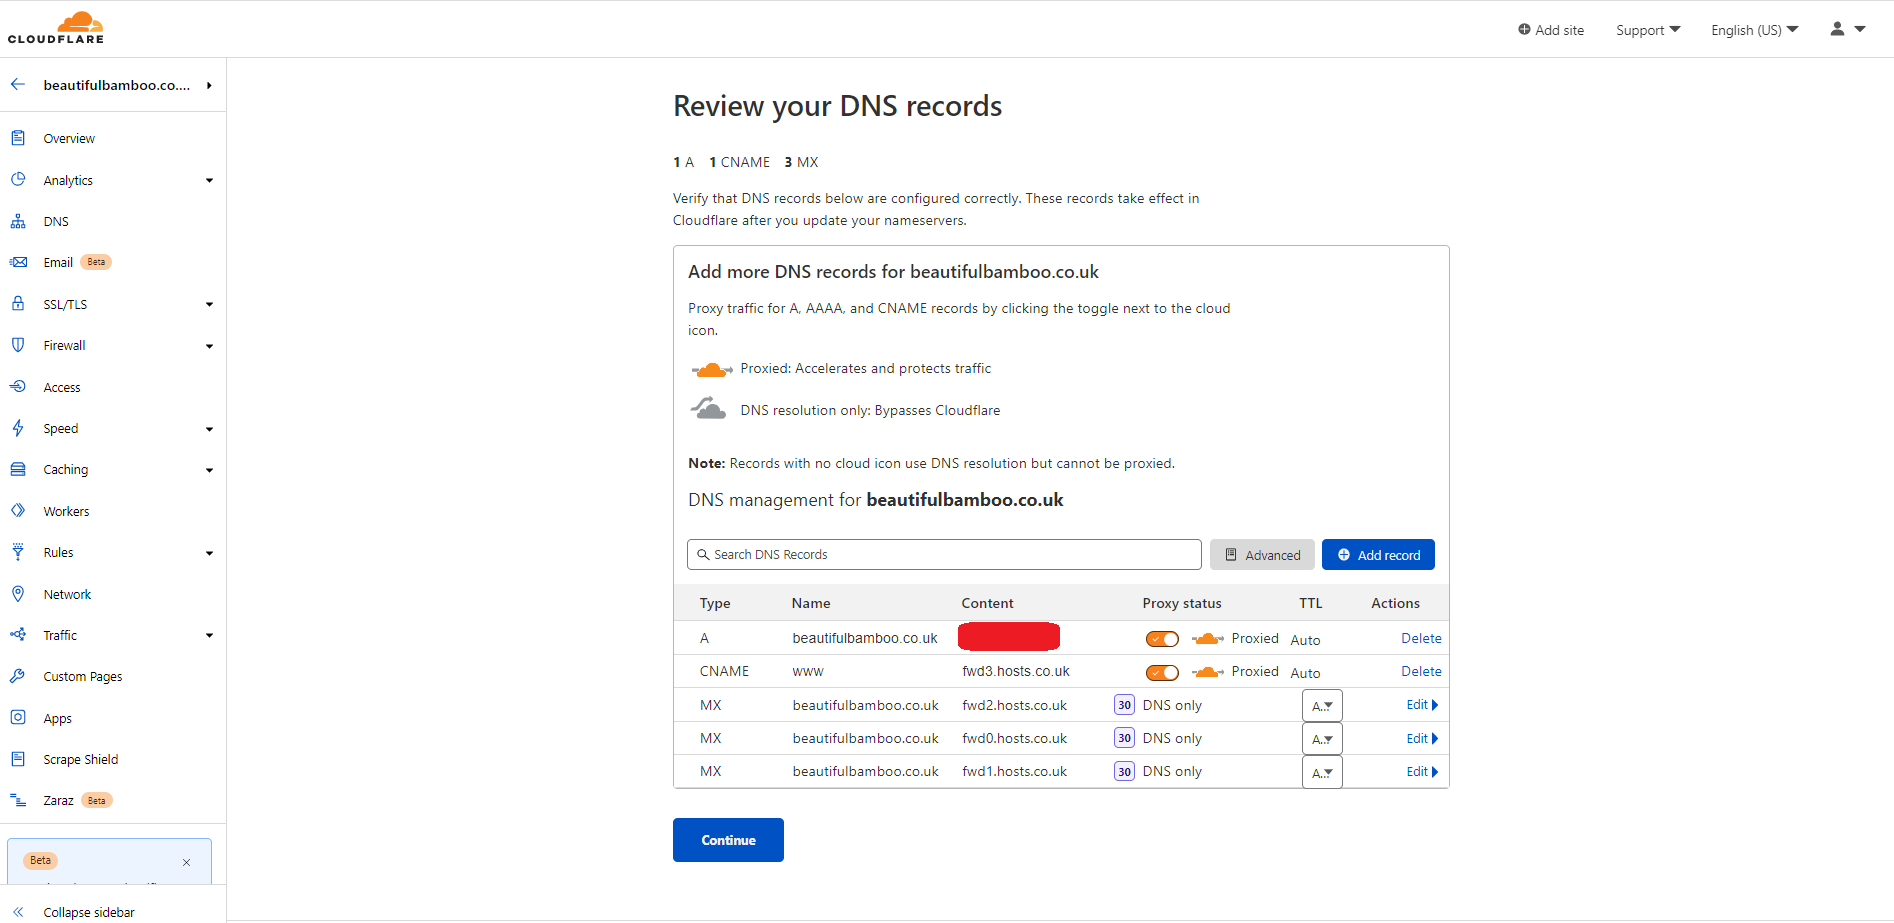
The next screen will show you the DNS records attached to that domain:
-
We then need to edit the CNAME record with the name WWW so that it is the same as what is said in the instructions on your selling account located in Website > Website Domain Name. We copy and paste that information (with StoreID being your StoreID number that starts 55xxxxx):
-
Change the content of the CNAME record that is called WWW to yourStoreID.sellrstores.com:
-
Press the blue + Add record button and select CNAME type. Change the Name to your domain (in this case beautifulbamboo.co.uk) and the Target to yourStoreID.sellrstores.com:
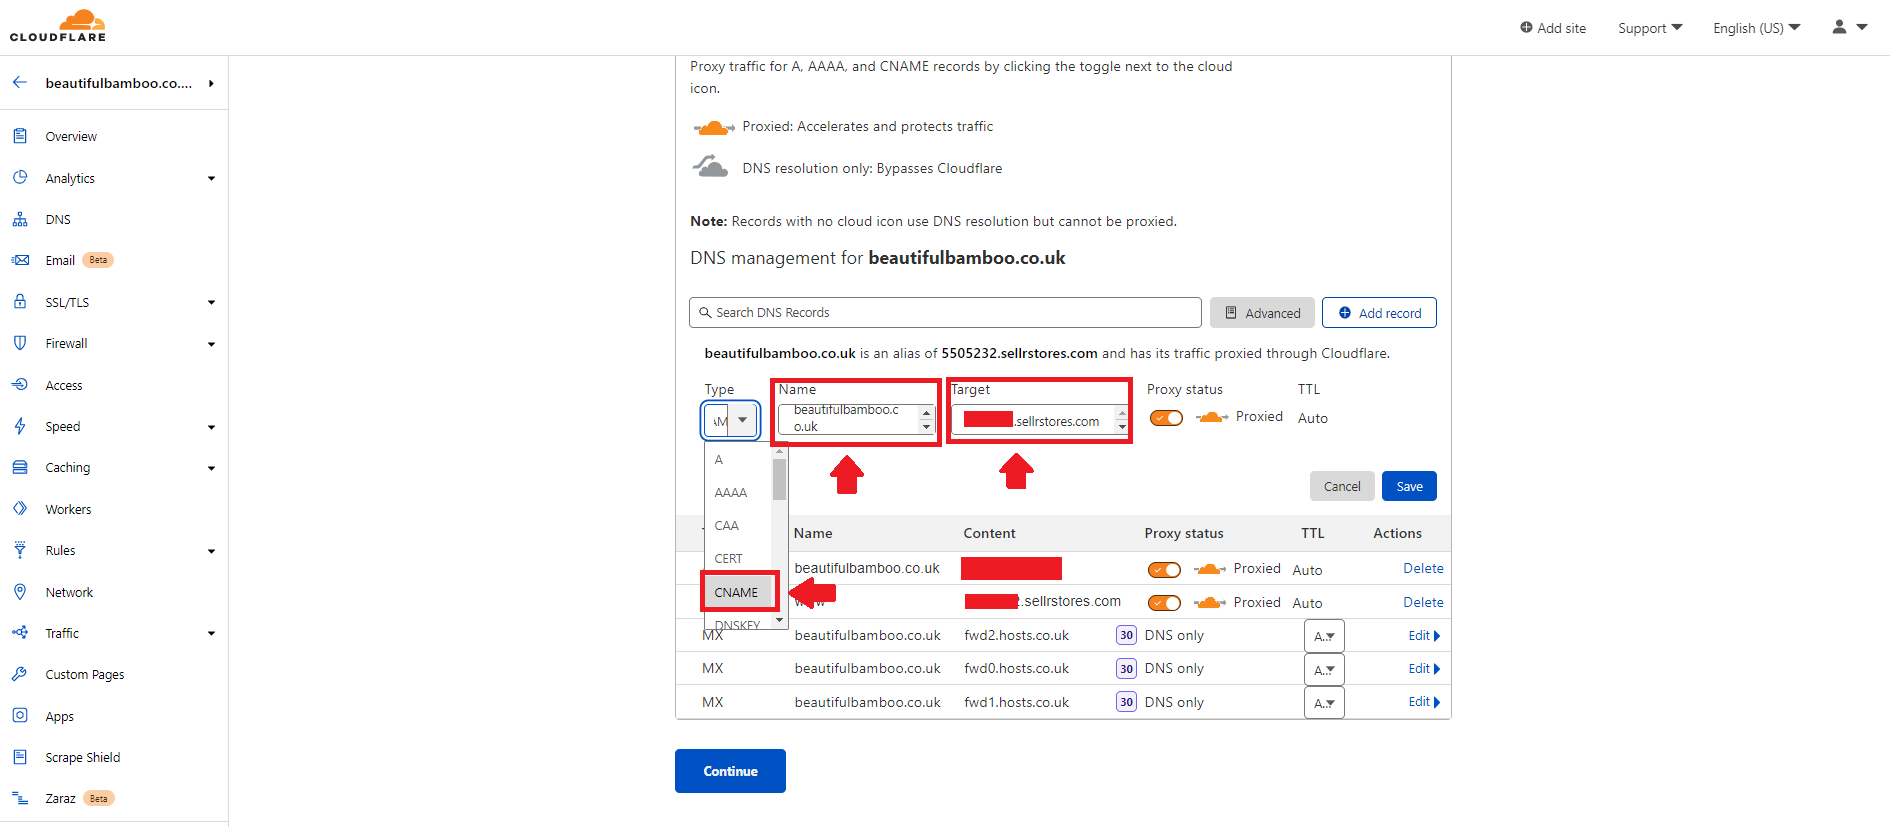
-
Next, press the blue Save button
-
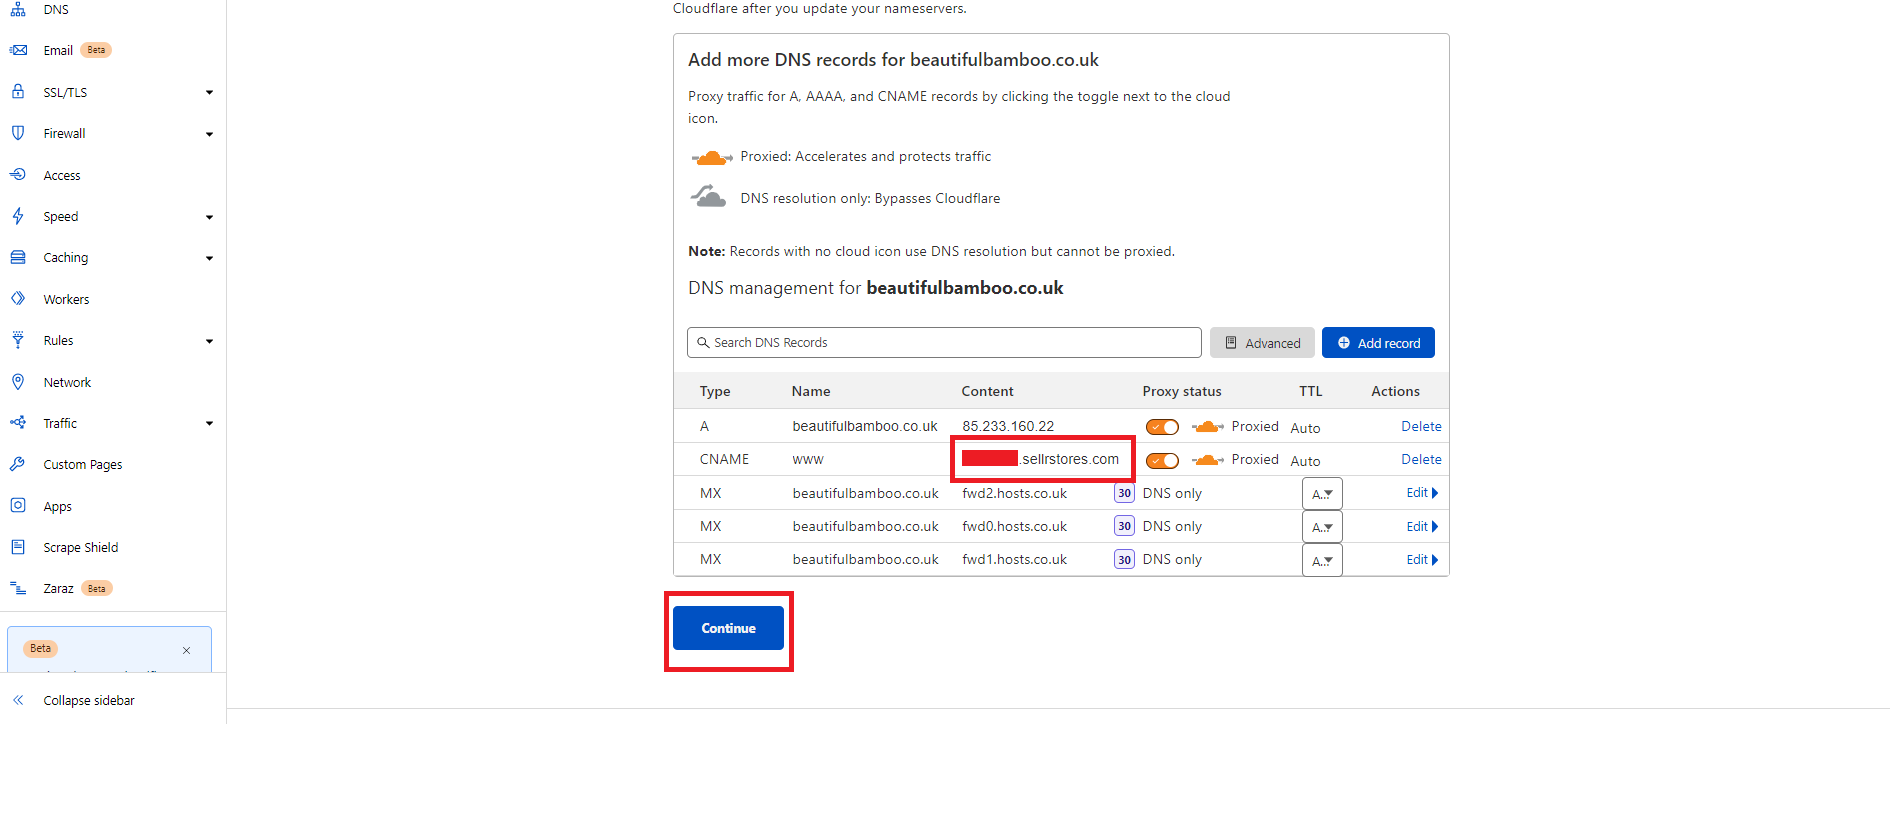
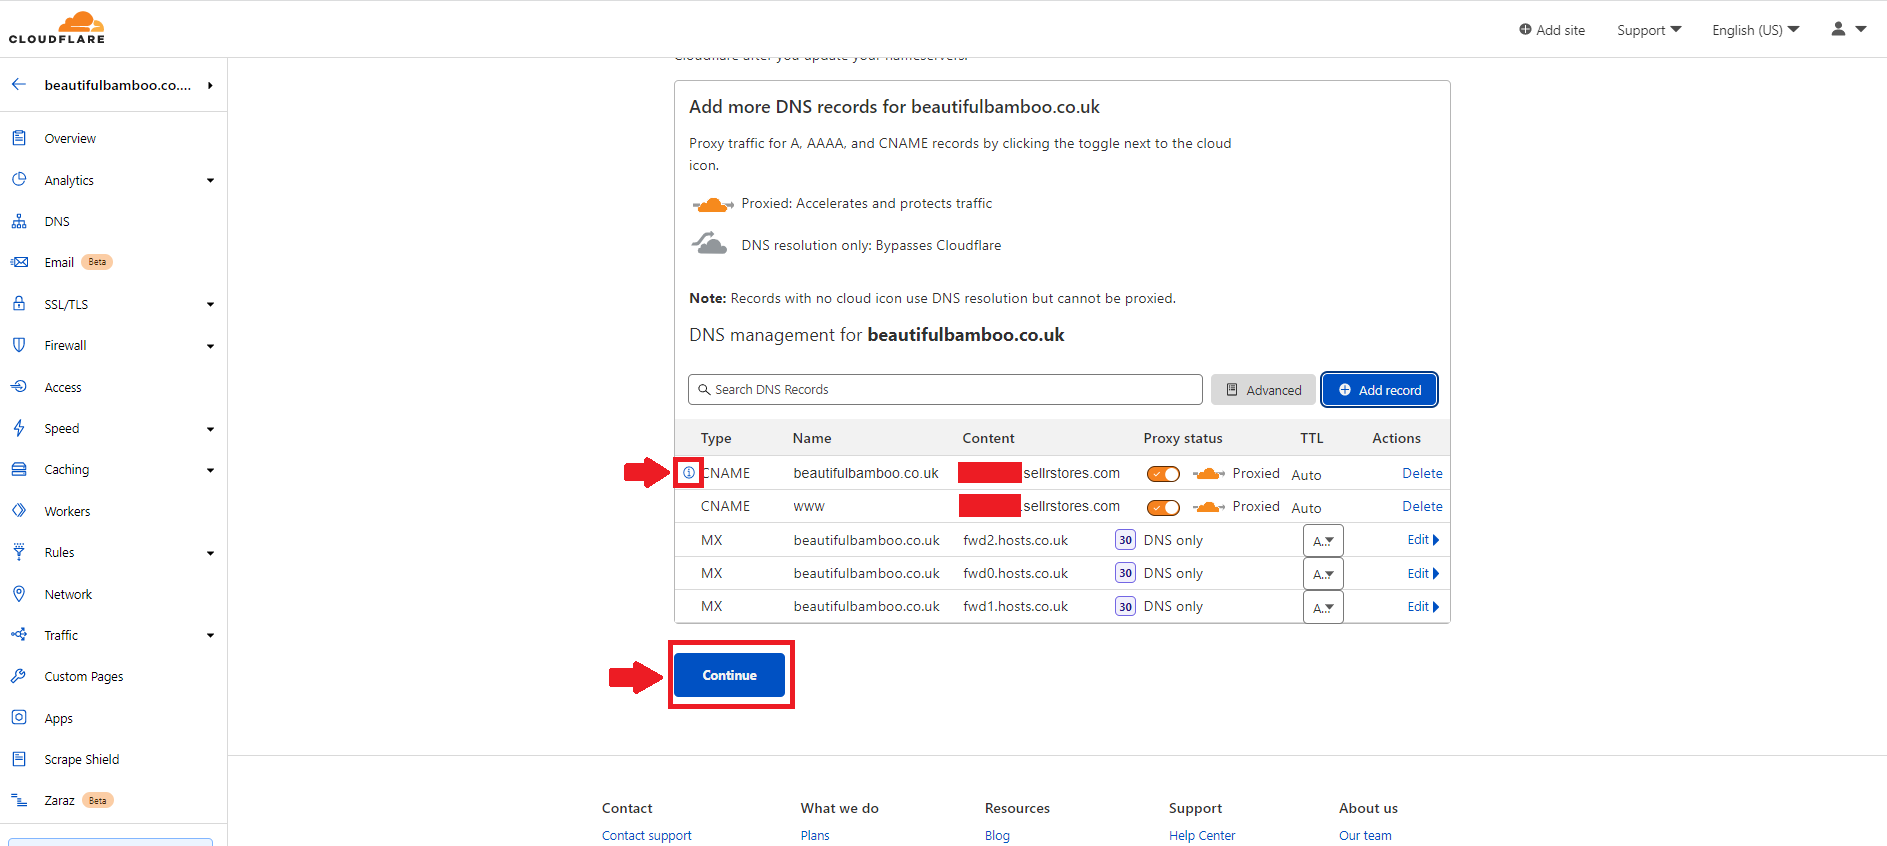
If all goes well, the next screen will show the record added to your DNS structure. It will have a little i symbol to show it is new. Press Continue:
-
The next screen will give you instructions on how to change your NS records (Name server records). Follow the instructions carefully. They will be slightly different depending on where you purchased you domain. Once this step is complete, your records will all be pointing in the correct direction and your customers will be able to type in your domain name to search for your store and your store will be renamed from www.55xxxx.sellrstores.com to www.yourcomapnydomain.com. Please bear in mind that updating your DNS records and NS records can take up to 48 hours to propagate fully across the global servers. This means if things aren't working immediately, don't panic, the updates will happen but we need to be patient. It may be a good idea to perform this action at a time when you expect less traffic on your site so there is no downtime or interruption of service. If you have any trouble with any of these steps, just raise a support ticket by contacting us at support@sellr.com
-
Once the records have propagated, I can type www.beautifulbamboo.co.uk into the address bar on any web browser and will be taken to my store: