


Intro to Sellr
Setting Up Your Ecommerce Store
Editing Your Ecommerce Store
The "Action" Section
The "Manage" Section
The "View" Section
The "Marketing" Section
CRM (Customer Relationship Manager) - Overview
Contacts - Contact Lists
Contacts - Import Lists
Contacts - Export List
Email Marketing - Schedule Emails
Email Marketing - On Page Sign Up
Email Marketing - Popup Email Signup
Email Marketing - Follow Up Emails
Autoresponders - Prospect Sequences
Autoresponders - Customer Sequences
Autoresponders - Item Sequences
Autoresponders - Welcome Back Sequence
TPS Screening
Add a Contact
Customer Accounts
GDPR
Social Media - Connecting Accounts
Social Media - Follow Icons
Promotions and Offers - Coupons
Promotions and Offers - Promotional Codes
Promotions and Offers - Offers
Promotions and Offers - Discounts
Promotions and Offers - Bundles
Promotions and Offers - Gift Cards
Cross-Sell and Up-Sell
External Scripts
Amazon Associates
The "Advertising" Section
The "Fulfilment" Section
The "Website" Section
The "Configure" Section
Migrating to Sellr
Selling in Person
Selling Online
Discounts and Promotions
Invoicing and Quotes
Items for Sale
Website Themes
Payments
Domains
Shipping
Managing Orders
Contact Management
Tax Settings
Email Marketing
Telesales
Selling On Marketplaces
Selling On Social Media
Connecting to Other Systems
How to Increase Your Sales
Email Marketing - Popup Email Signup
Used to automatically push an email signup form to a customer who has been browsing your store for a chosen amount of time. Once they have input their email address into the popup, they will be added to a contact list of your choosing or a prospect sequence if relevant. This pop up can be added to the website, blog or both
To set up and configure the popup email signup feature, follow these steps:
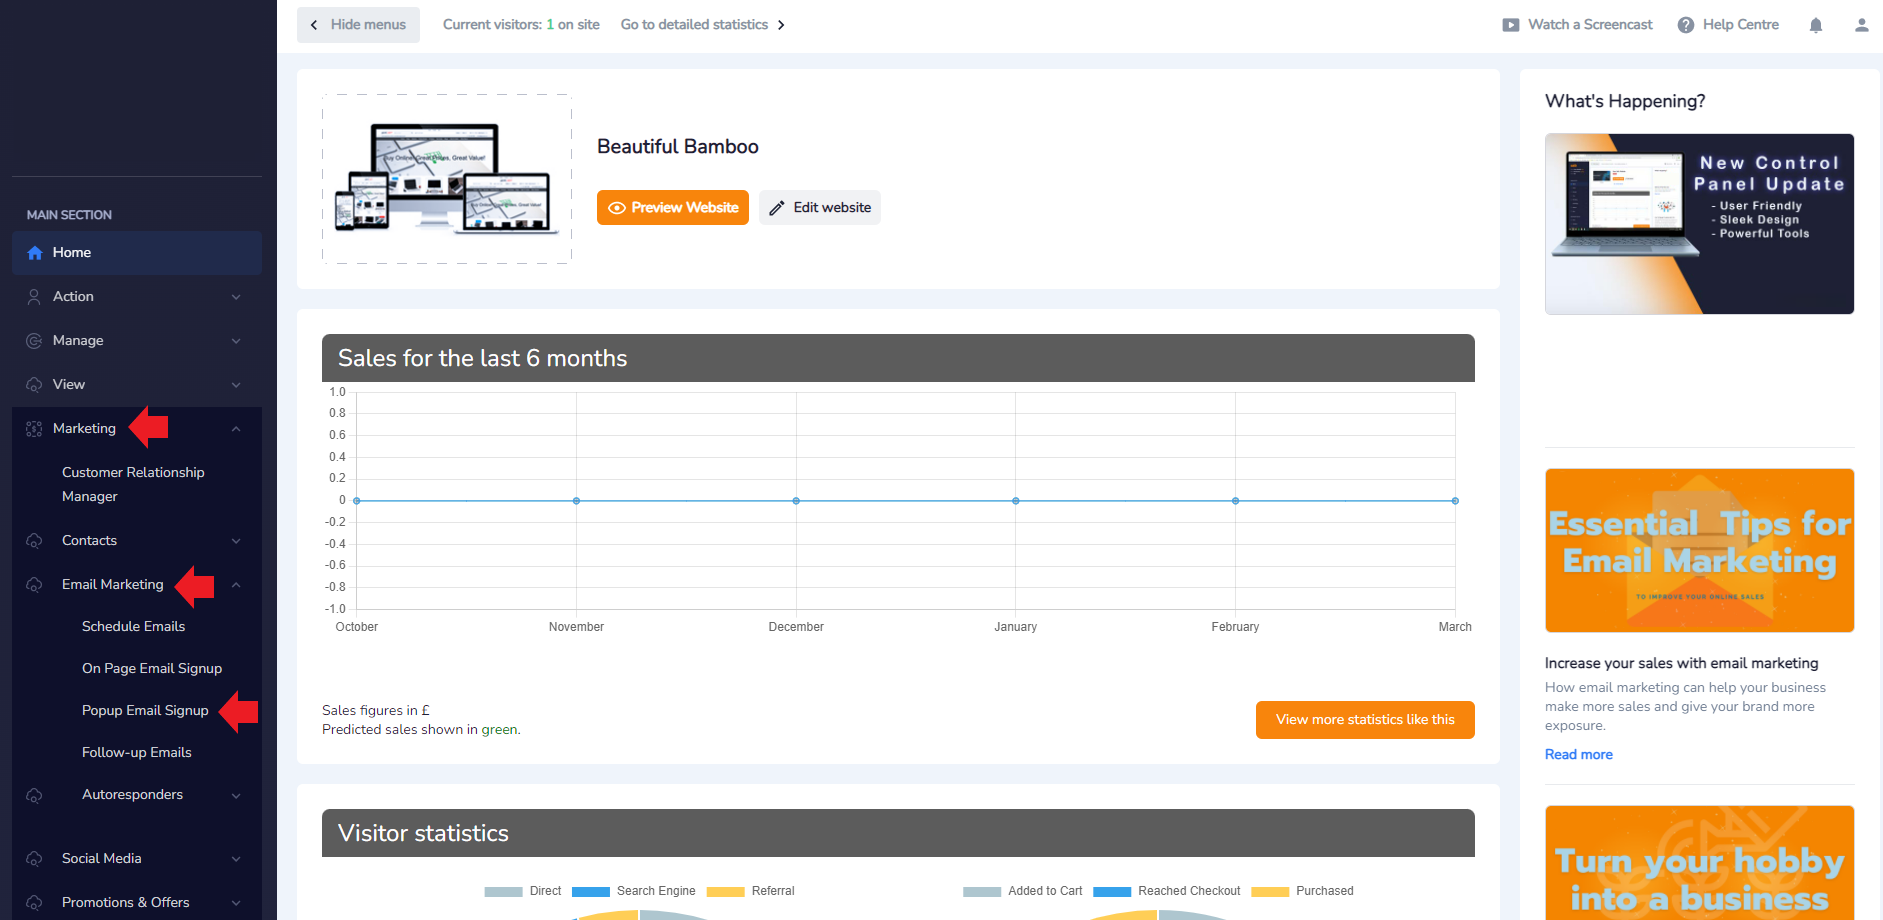
- From the Admin Panel, look to the left and select Marketing > Email Marketing > Popup Email Signup:
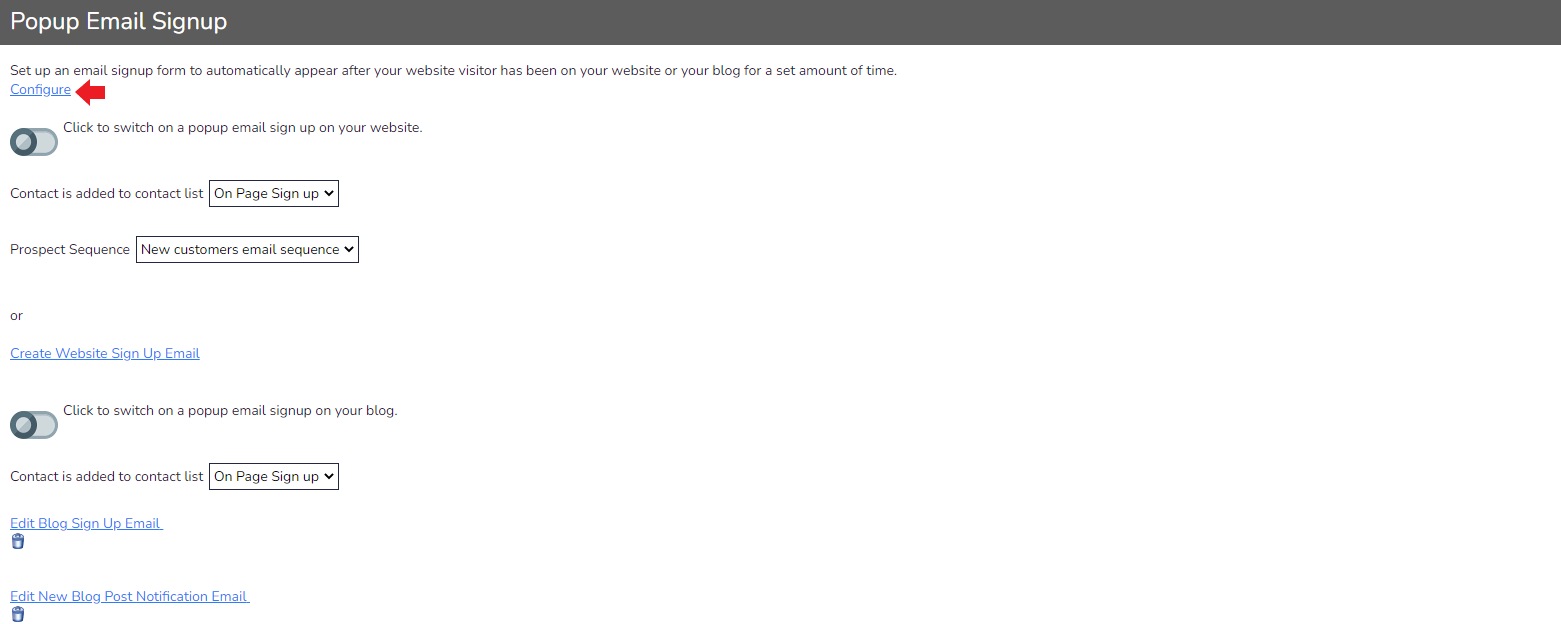
- The next page will display the Popup Email Manager. First, select Configure:
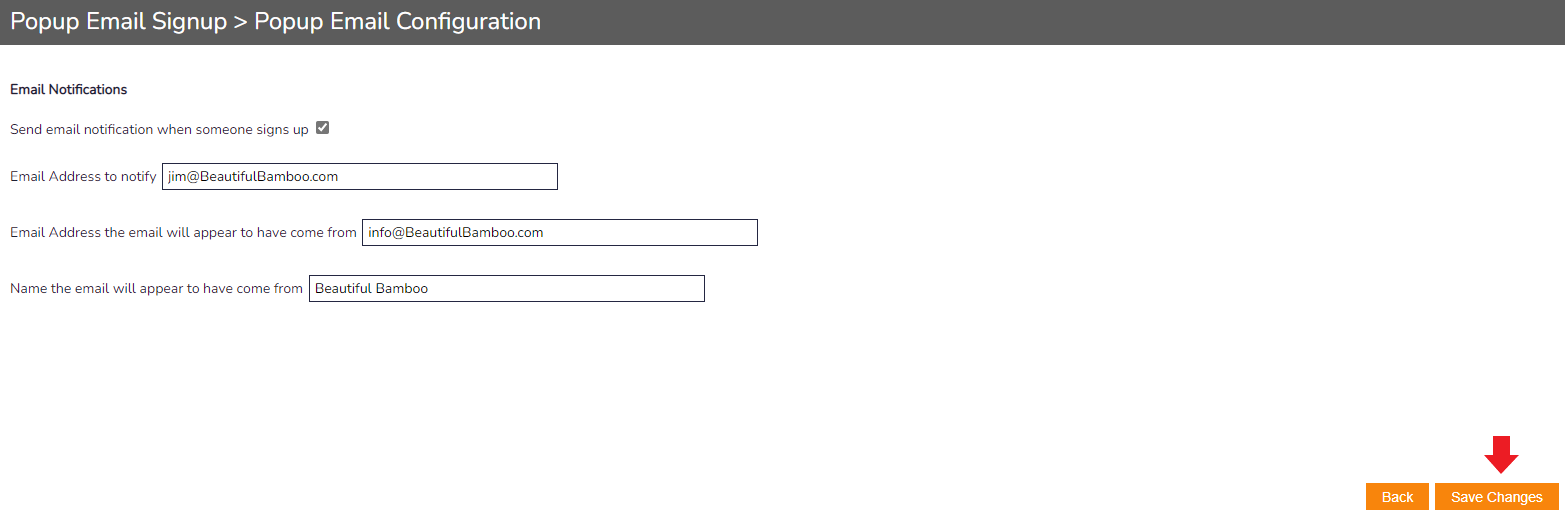
- Adjust the available options to your specific needs and then Save Changes:
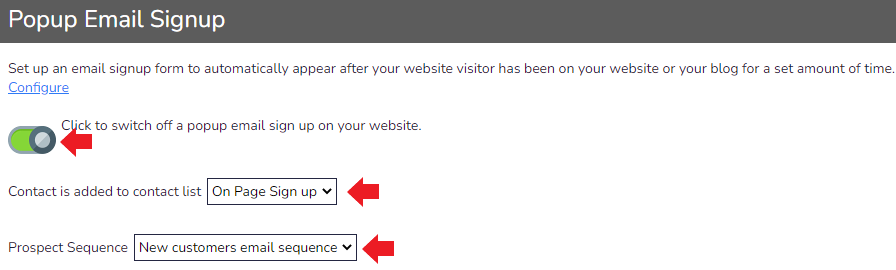
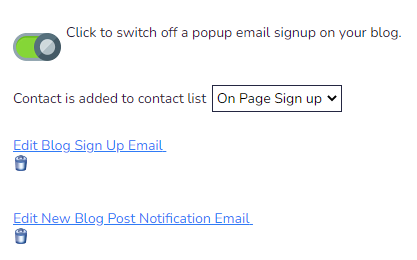
- You will be returned to the previous page. Turn the slider on (green) and then adjust the Contact List and Prospect Sequence (if using one). If you do not already have an email defined, you can select Create Website Signup Email to create a new one:
- Further down the same page, there are similar options to add to your Blog. Repeat the steps above if you would like to turn on the Popup Email Signup form for your Blog:
- The Popup Email Signup is ready to use. To actually add it to your website though, you need to flipto Edit Mode. Press Home on the left of the screen and then select Edit Website to get to Edit Mode on your online store
- Select the Content Blocks tool:

- Scroll to the Main Section and then select the Green + icon
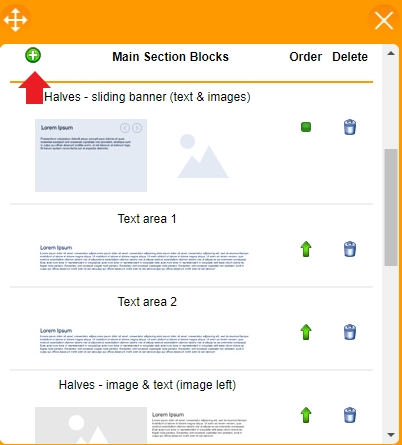
- Scroll to find Email Popup. Click it to add the block to the hierarchy:
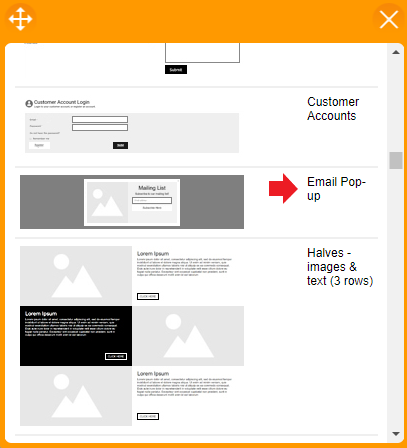
- Close the Content Blocks Manager and the system will update
- A new tool icon will appear at the bottom of the toolset that looks like an eye. Click it to open the Pop Email Signup Form to edit:

- Expand the available toolset by clicking the Spanner and Screwdriver symbol in the top left, then select the Clock icon:
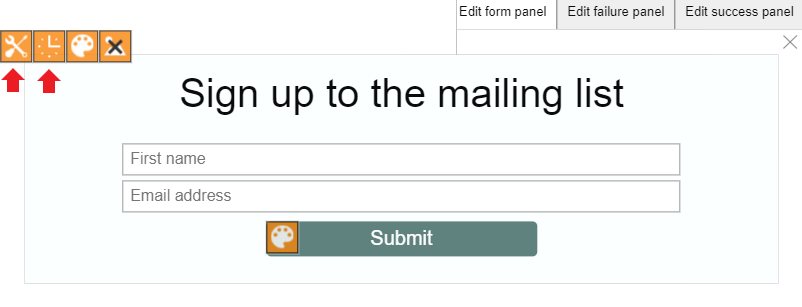
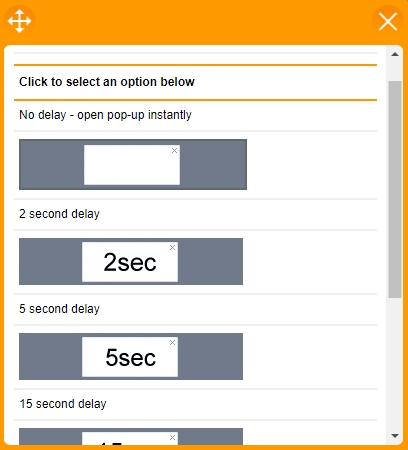
- Select the Time Delay from the page loading to the pop up appearing:
- Close the Time Delay window and the system will update. You can edit the text that appears on the form by directly typing into the text areas
- The Pop Email Signup form will now display on your online store when customers visit


